Techniqued- Technoloy, Review and Tutorials
  • Android
  • Freewares
  • Tutorial
  • Windows 11
  • macOS
No Result
View All Result
Techniqued- Technoloy, Review and Tutorials
  • Android
  • Freewares
  • Tutorial
  • Windows 11
  • macOS
No Result
View All Result
Techniqued- Technoloy, Review and Tutorials
No Result
View All Result

How to Create an Administrator Account in macOS Ventura

Nirmal by Nirmal
December 14, 2022
in macOS
0
Share on FacebookShare on Twitter

Each and every operating system has its own option of creating users. Almost all of the OSes support multiple users and you can create as many users as you wish. you can also assign an account type to each of these users. An administrator account is an acccount which has the highest level of access and as the name indicates, it is the most important account and can make any changes to the system, while a standard account has limitations. While you need to have one administrator account in each OS, it is always good to have a spare admin account. In case you are using a macOS Ventura, you can create multiple admin account, here is how to create an administrator account in macOS Ventura.

Related Reading: How to Show Hidden Files in macOS

Create an Administrator Account in macOS

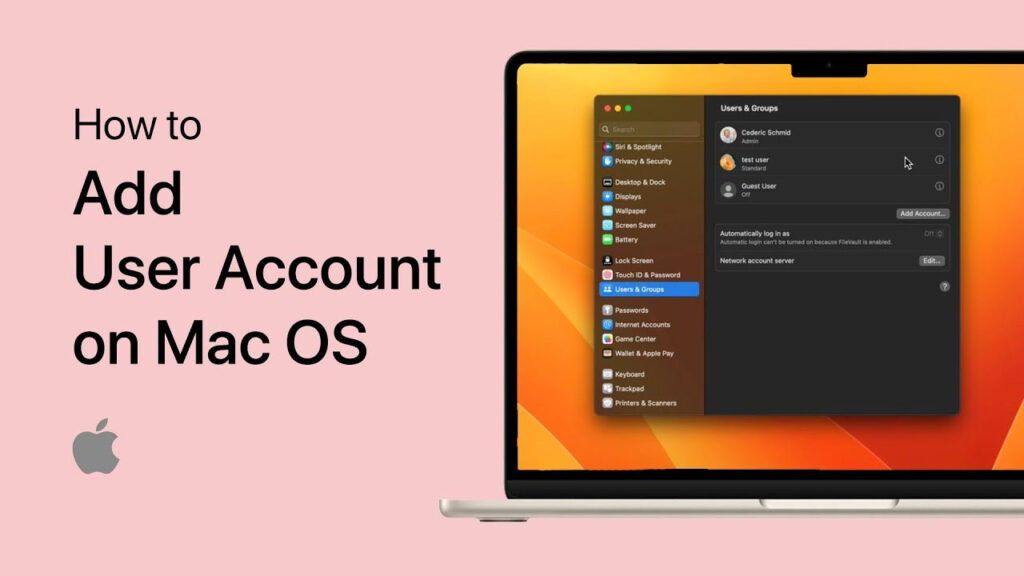
How to Create an Administrator Account in macOS Ventura:

Step 1: The first step is to open the Settings panel in macOS Ventura as it is the app where you can make changes to the system.

Create an Administrator Account in macOS

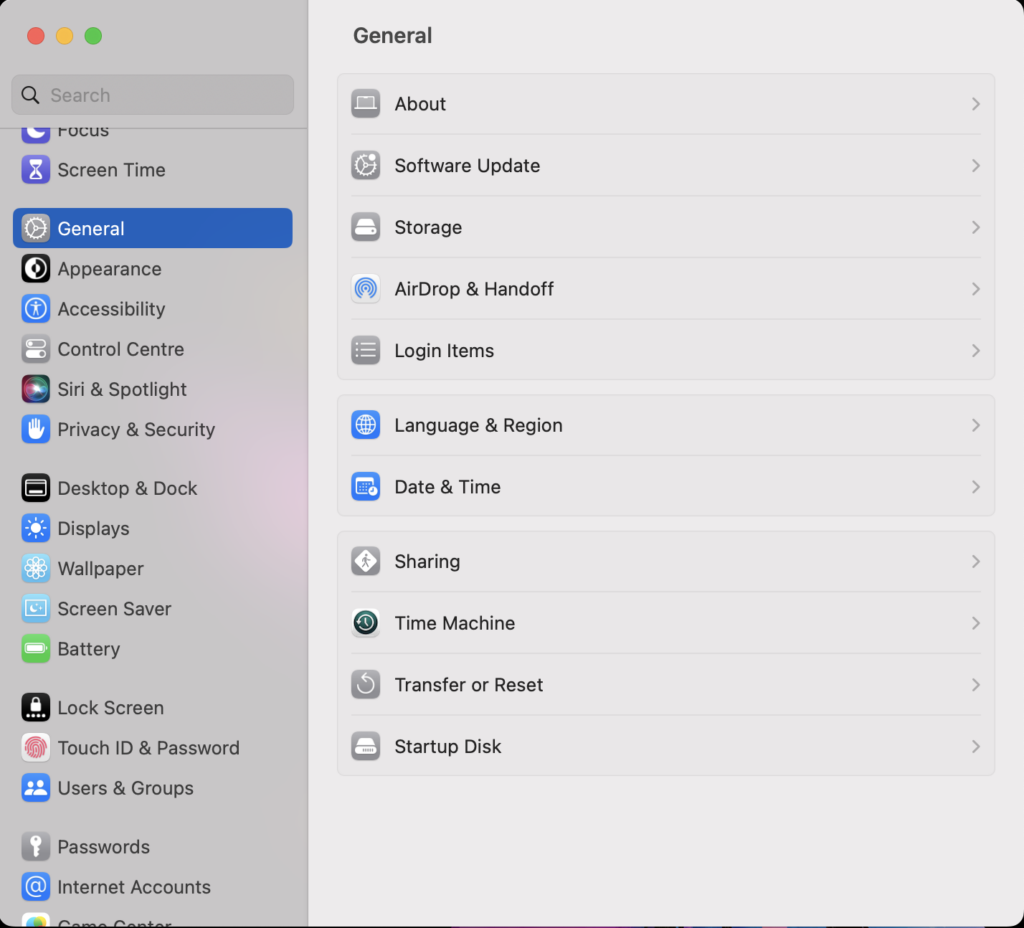
Step 2: Under the General, select Users and Groups on the left sidebar.

Create an Administrator Account in macOS

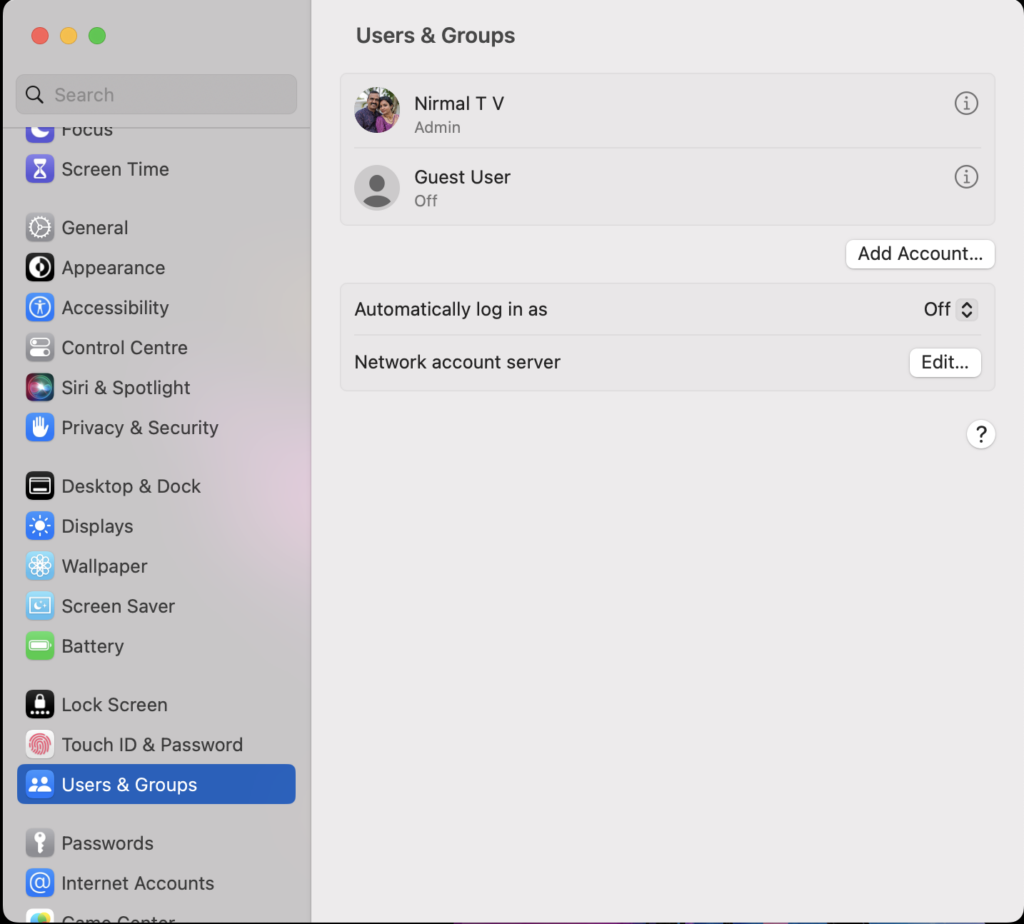
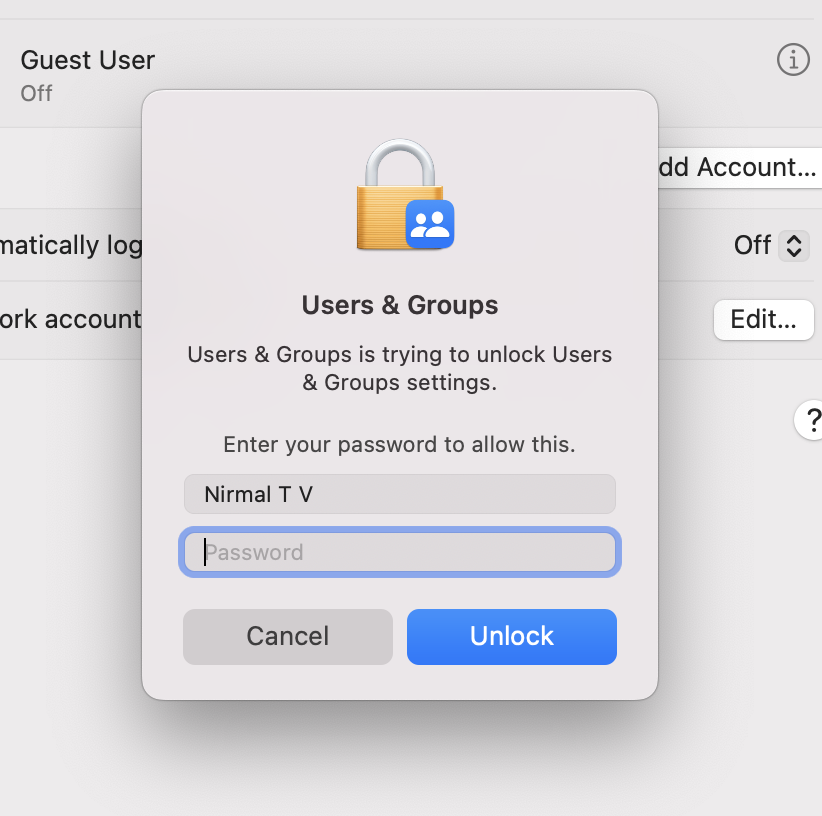
Step 3: Now click on the add account button in this page. This will prompt you to enter the current password of your admin account. You need to make sure you are logged in with the admin account.

Step 4: Now you get an option to create a new account. You need to enter the details, account name, password, and more. You need to make sure you have a strong password, you can also enter a hint for the new account password.

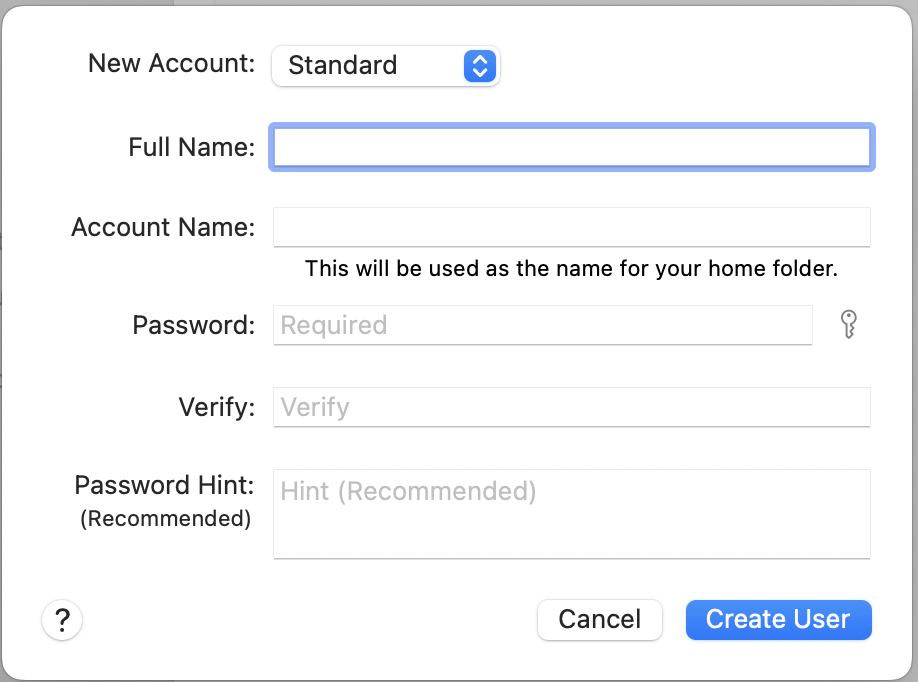
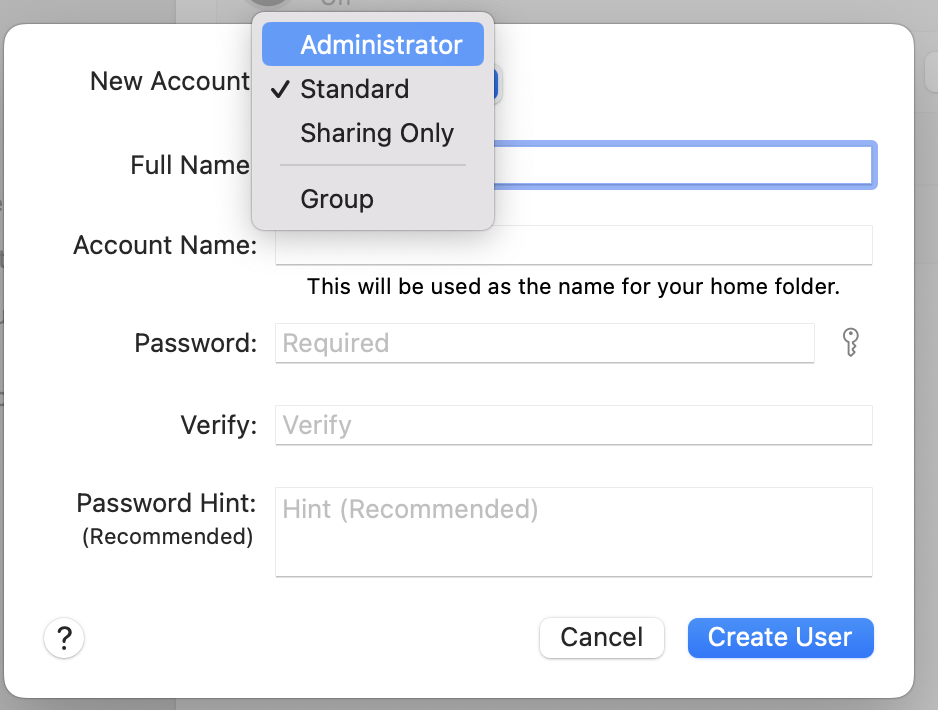
Step 5: You need to select Administrator option under the New account dropdown. The default option will be standard account.

Step 6: Once you have entered all the details, click on the Create User button and your administrator account will be created on macOS Ventura.

Tags: macOSUser AccountsVentura
ShareTweetSendSend
Previous Post

How to Remove a Service from Windows 11

Next Post

How to Disable iMessage Notifications in macOS

Related Posts

macOS

How to Remove Startup Items in macOS

April 8, 2023
macOS

How to Clear Browsing Data on Safari on macOS

April 8, 2023
macOS

How to Enable Firewall on macOS Ventura

March 12, 2023
macOS

How to Clear Space Occupied by File Provider Ingest Folder in macOS

January 2, 2023
Featured

7 Best File Managers for macOS- Finder Alternatives

December 18, 2022
macOS

How to Scan Documents on your macOS using iPhone with Continuity Camera

December 17, 2022

Leave a Reply Cancel reply

Your email address will not be published. Required fields are marked *

This site uses Akismet to reduce spam. Learn how your comment data is processed.


Latest Articles

6 Best AI Tools for Better Meetings

How to Fix “This App Has Been Blocked by Your System Administrator” Error in Windows

How to Automatically Upload iPhone Photos to Google Photos

How to Download Photos and Videos from Google Drive to iPhone

Download DirectX All Versions [9, 10, 11, 12]

5 Best Call Recording Apps for Android

Techniqued- Technoloy, Review and Tutorials

© 2021 Techniqued - Technology, Tips, Tricks and Reviews

Navigate Site

  • About Us
  • Advertise with us
  • Contact Us
  • Copyright Policy
  • Disclaimer

Follow Us

No Result
View All Result
  • Android
  • Freewares
  • Tutorial
  • Windows 11
  • macOS

© 2021 Techniqued - Technology, Tips, Tricks and Reviews

This website uses cookies. By continuing to use this website you are giving consent to cookies being used. Visit our Privacy and Cookie Policy.