Techniqued- Technoloy, Review and Tutorials
  • Android
  • Freewares
  • Tutorial
  • Windows 11
  • macOS
No Result
View All Result
Techniqued- Technoloy, Review and Tutorials
  • Android
  • Freewares
  • Tutorial
  • Windows 11
  • macOS
No Result
View All Result
Techniqued- Technoloy, Review and Tutorials
No Result
View All Result

How to Disable iMessage Notifications in macOS

Nirmal by Nirmal
December 15, 2022
in macOS
0
Share on FacebookShare on Twitter

If you are already using an Apple product, you might be knowing iMessage. iMessage is an instant messaging service developed by Apple Inc. and launched in 2011. iMessage functions exclusively on Apple platforms: macOS, iOS, iPadOS, and watchOS. Using iMessage, you can send text messages, images, videos, and documents along with getting delivery and read statuses, and end-to-end encryption so only the sender and recipient can read the messages. If you are using a Mac with iPhone, then whenever you get a message on iPhone, there is a notification on Mac as well. This is because of the tight integration of all the Apple products. But in case you do not want this, you can disable iMessage notifications in macOS, here is how to do it.

Related Reading: How to Find Your MAC Address in macOS Ventura

How to Disable iMessage Notifications in macOS:

If you do not want iMessage notifications on your macOS, there are two ways to stop it.

Disable iMessage Notifications:

Step 1: In order to disable iMessage notifications, open the Settings app on your macOS and select Notifcations on the left side.

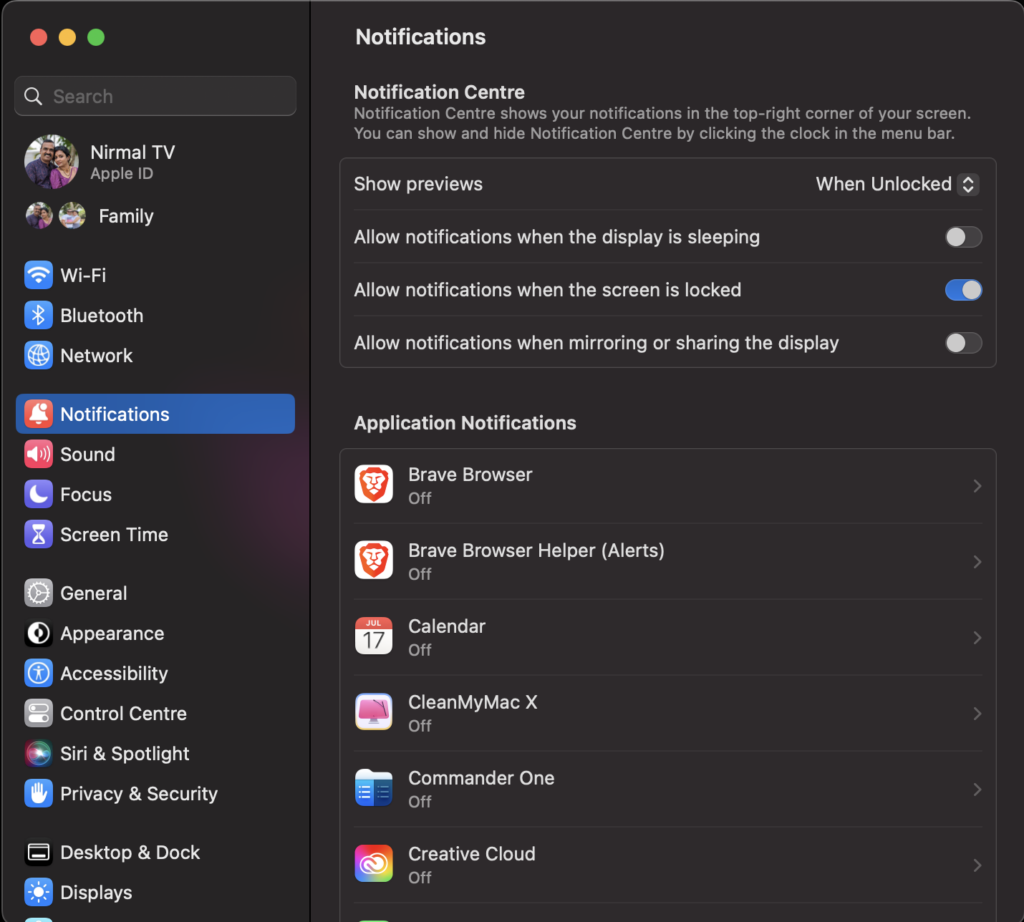
Step 2: Here you will see app the apps listed and now you need to search for Messages app.

Step 3: When you select Messages from the list, you can see an option to disable notifications for Messages on your Mac.

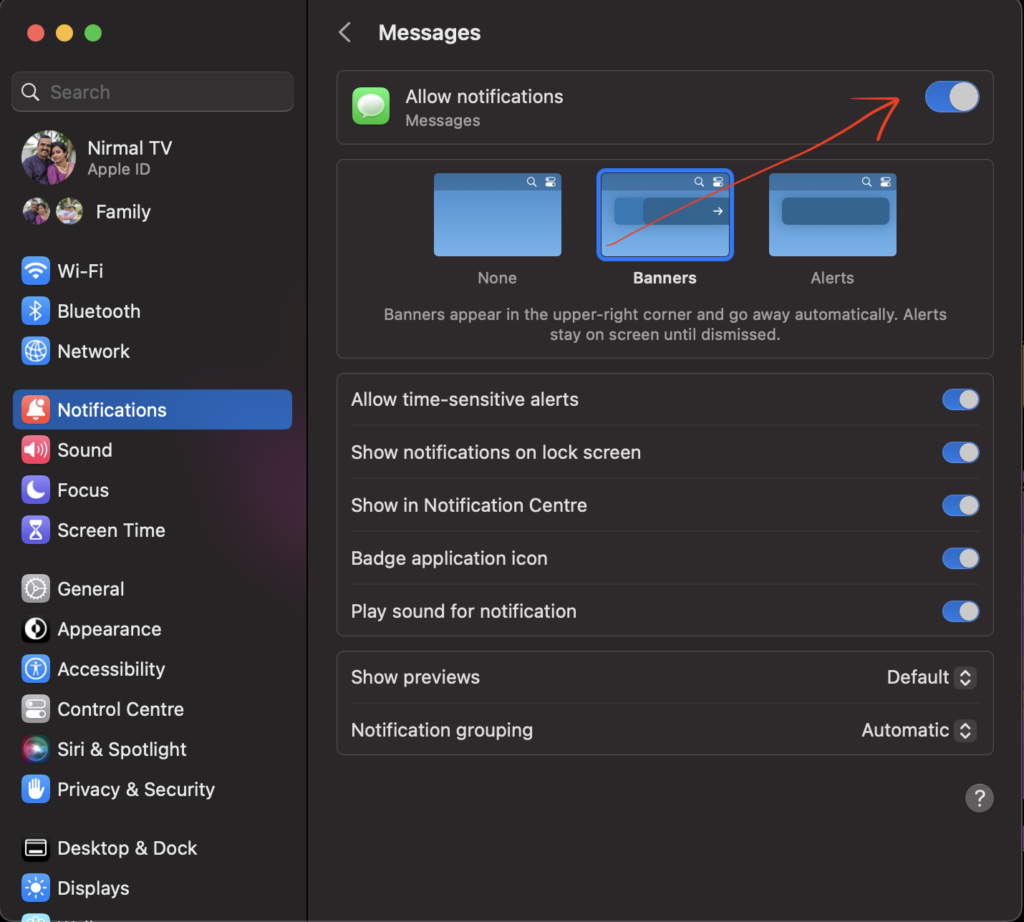
Step 4: You can also selectively disable the notifications from iMessage using this option.

Sign out of iMessage on macOS:

Step 1: If you do not want iMessage on macOS, then you can also sign out of the service on your macOS.

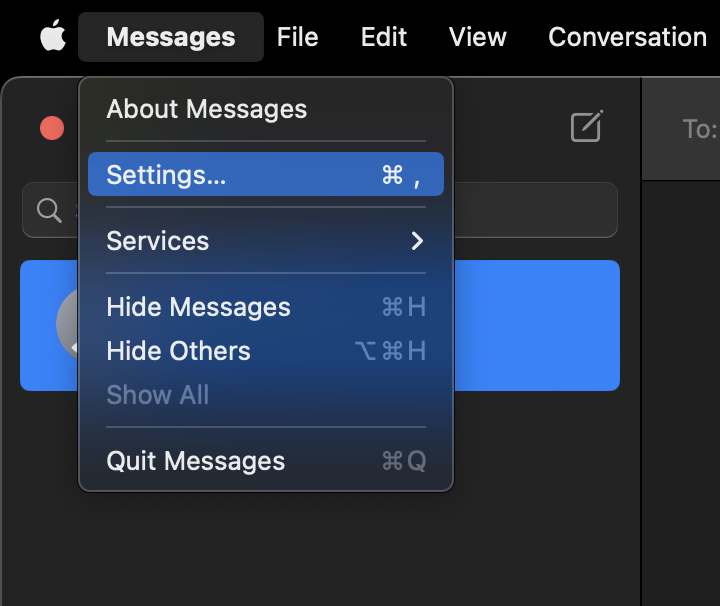
Step 2: For this, open Messages app on your macOS.

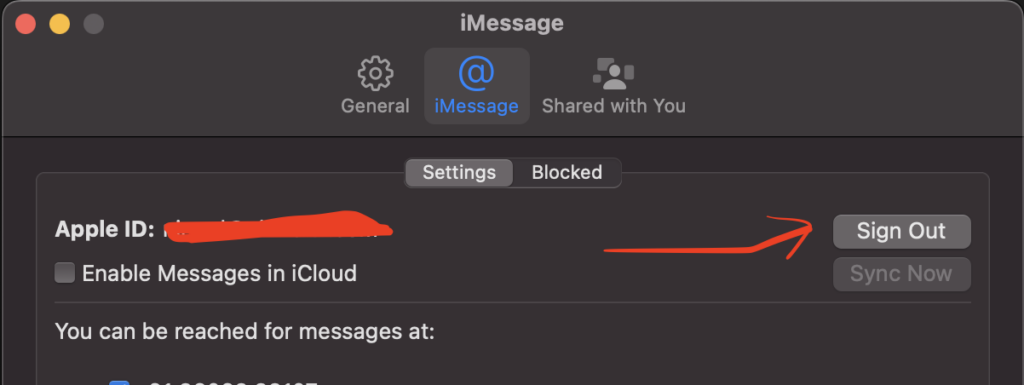
Step 3: Click on the menu bar and select Messages-> Settings from the list.

Step 4: This will open the iMessage settings and here you will be able to see your account details including Apple ID and the mobile number registered with iMessage. You will be able to see a button Sign Out. Click on this and you will be logged out of iMessage.

Now on you will not get any notifications from iMessage on your macOS Ventura.

Tags: How toiMessagemacOS
ShareTweetSendSend
Previous Post

How to Create an Administrator Account in macOS Ventura

Next Post

How to Reset Hosts File in Windows 11

Related Posts

macOS

How to Clear Space Occupied by File Provider Ingest Folder in macOS

January 2, 2023
Featured

7 Best File Managers for macOS- Finder Alternatives

December 18, 2022
macOS

How to Scan Documents on your macOS using iPhone with Continuity Camera

December 17, 2022
Freewares

Completely Uninstall any app from macOS using AppCleaner

December 17, 2022
macOS

How to Password Protect a PDF file on macOS

December 16, 2022
macOS

How to Create an Administrator Account in macOS Ventura

December 14, 2022

Leave a Reply Cancel reply

Your email address will not be published. Required fields are marked *

This site uses Akismet to reduce spam. Learn how your comment data is processed.


Latest Articles

How to Use Emojis in Windows 11 with Keyboard Shortcut

How to Fix “Operation Failed With Error 0x0000011B” in Windows

7 Best Android Emulators for Windows 11

How to Use Two WhatsApp Accounts on an iPhone

How to Find BitLocker Recovery Key

10 Best Free Online Video Editors [2023]

Techniqued- Technoloy, Review and Tutorials

© 2021 Techniqued - Technology, Tips, Tricks and Reviews

Navigate Site

  • About Us
  • Advertise with us
  • Contact Us
  • Copyright Policy
  • Disclaimer

Follow Us

No Result
View All Result
  • Android
  • Freewares
  • Tutorial
  • Windows 11
  • macOS

© 2021 Techniqued - Technology, Tips, Tricks and Reviews

This website uses cookies. By continuing to use this website you are giving consent to cookies being used. Visit our Privacy and Cookie Policy.