Techniqued- Technoloy, Review and Tutorials
  • Android
  • Freewares
  • Tutorial
  • Windows 11
  • macOS
No Result
View All Result
Techniqued- Technoloy, Review and Tutorials
  • Android
  • Freewares
  • Tutorial
  • Windows 11
  • macOS
No Result
View All Result
Techniqued- Technoloy, Review and Tutorials
No Result
View All Result

How to Change Start Up Items in macOS Ventura

Nirmal by Nirmal
December 11, 2022
in macOS, Tips and Tricks
0
Share on FacebookShare on Twitter

When you boot your macOS Ventura, there are certain apps or files which are started with the login. If you are the administrator of your Mac, you can select the apps, documents, and server connections that open automatically when you log in to your Mac. So in case, your work has certain apps which need to be opened as soon as you boot, then you can actually use this option in macOS Ventura. Here is how to Change Start Up Items in macOS Ventura.

Related Reading: How to Show Hidden Files in macOS

Change Start Up Items in macOS Ventura

How to Change Start-Up Items in macOS Ventura:

If you want to change the login items in macOS Ventura, follow the steps below.

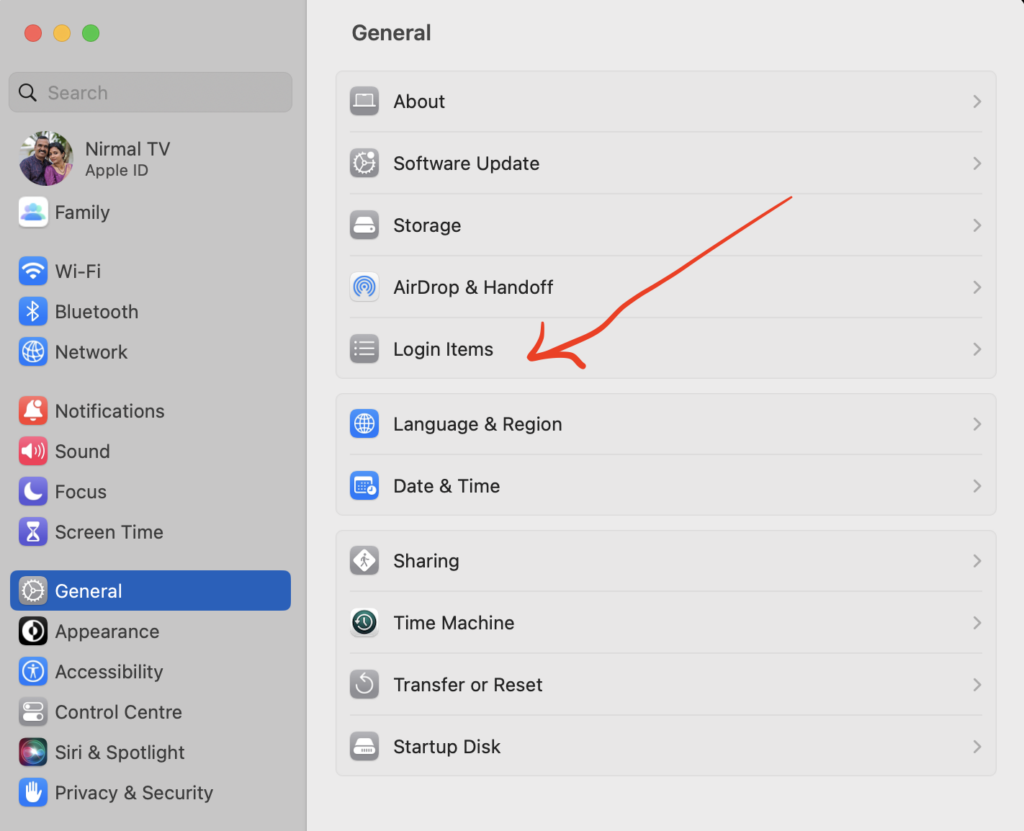
Step 1: Open the Settings panel in your macOS.

Step 2: Click on the General settings from the left sidebar. Now on the right side, you will be able to see Login items listed.

Change Start Up Items in macOS Ventura

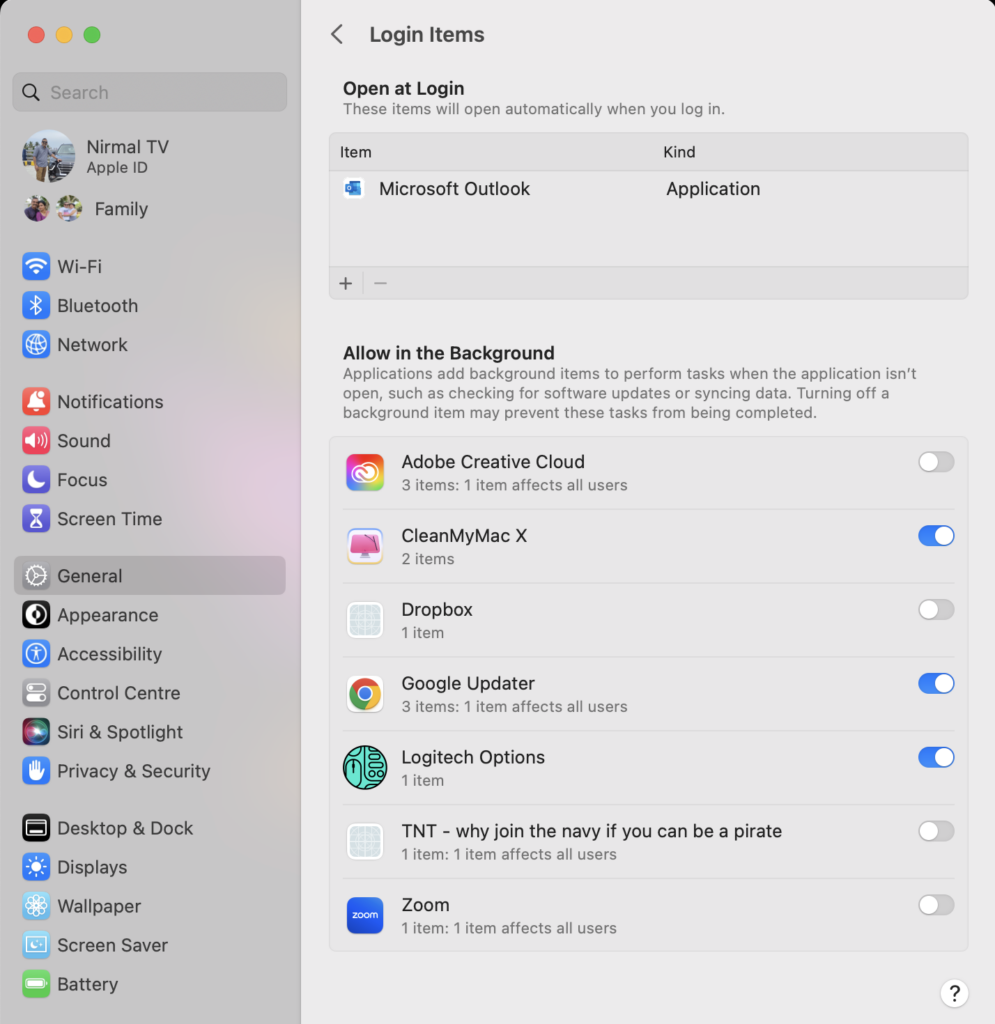
Step 3: Under the login items there are two main sections. In the first section, you can add the programs or files which you want to open at login.

Change Start Up Items in macOS Ventura

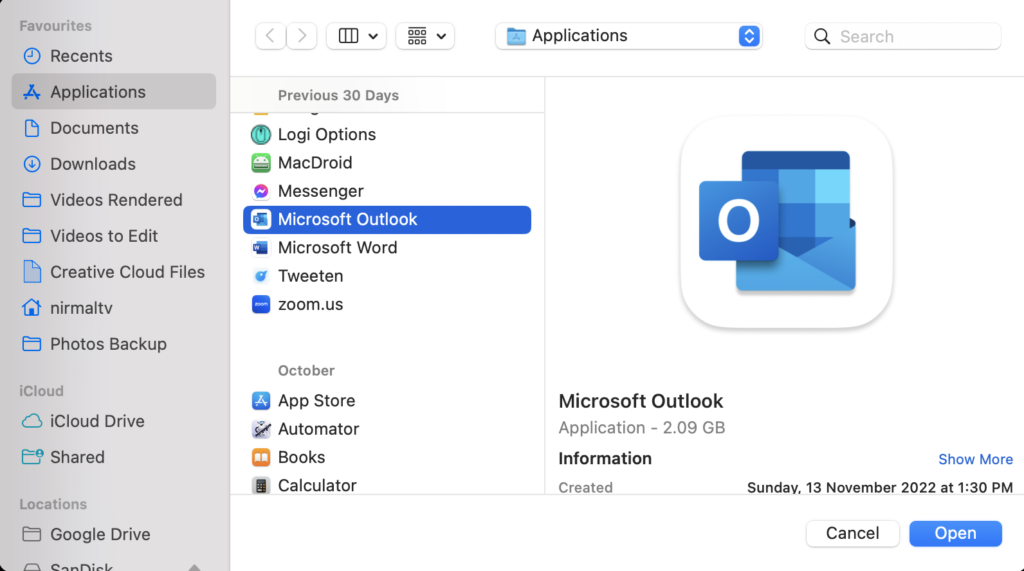
Step 4: Here you will be able to see a + icon, when you click on this, you can add the program or file which you want to open at login. Here we are going to add Outlook at login.

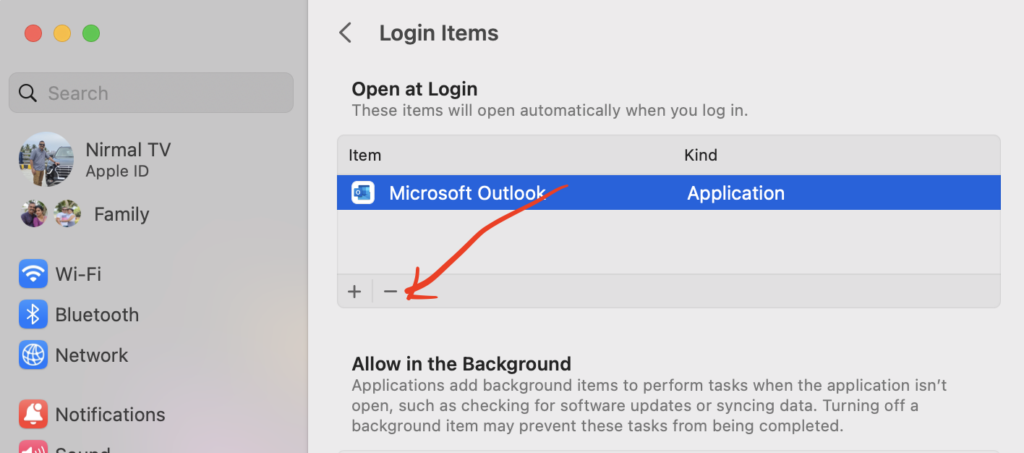
Step 5: Once you have added it, you can see it in the list. If you want to remove the app or file, select the item from the list and click on the – icon and it will be deleted.

Step 6: The second list is the list of apps that are automatically added by themselves for the startup of macOS. These might be important for the particular app to function. In case you feel it is not needed, you can disable it using the slider against the app.

This is how you can add or remove apps from the login or start-up items in macOS Ventura.

Tags: How tomacOS
ShareTweetSendSend
Previous Post

How to Back up your BitLocker Recovery Key in Windows 11

Next Post

How to Uninstall Apps on a macOS Ventura

Related Posts

Tips and Tricks

Can I Run Windows 11 without Activating

June 14, 2024
Social Networks

How to Change your Instagram Name

May 12, 2024
Social Networks

How To View Your Instagram Reels Watch History

May 11, 2024
Social Networks

How To Post Longer Videos On Instagram

May 6, 2024
Social Networks

How to Find Who Unfollowed you on Instagram

December 9, 2023
Social Networks

How to Download Instagram Reels [Official Method]

November 28, 2023

Leave a Reply Cancel reply

Your email address will not be published. Required fields are marked *

This site uses Akismet to reduce spam. Learn how your comment data is processed.


Latest Articles

How to Fix “Installation can’t continue” when trying to Update Nvidia Graphics Drivers

Download Windows 11 24H2 ISO (Offline Installer)

Can I Run Windows 11 without Activating

How to Use Snapchat on PC

How to Delete YouTube Search and Watch History on iPhone

How to Use Energy Saver on Windows 11

Techniqued- Technoloy, Review and Tutorials

© 2021 Techniqued - Technology, Tips, Tricks and Reviews

Navigate Site

  • About Us
  • Advertise with us
  • Contact Us
  • Copyright Policy
  • Disclaimer

Follow Us

No Result
View All Result
  • Android
  • Freewares
  • Tutorial
  • Windows 11
  • macOS

© 2021 Techniqued - Technology, Tips, Tricks and Reviews

This website uses cookies. By continuing to use this website you are giving consent to cookies being used. Visit our Privacy and Cookie Policy.