There are certain places where there is internet restrictions and you won’t be able to access all the websites. Similarly if you want a private network where you are not tracked, then you should be looking at VPN services. Similarly, if you are not able to access some websites in your country or if they are blocked, the best option is to try a VPN connection. A virtual private network (VPN) extends a private network across public networks like the Internet. It enables a host computer to send and receive data across shared or public networks as if they were an integral part of the private network with all the functionality, security and management policies of the private network. In this article, we will see how to create a VPN connection in Windows 11.
VPN services are available for all operating systems including Windows, macOS, Android, iOS and more and most of the VPN services will have their own app, but in case you want to configure it manually, here is how to do it.
How to Create a VPN Connection in Windows 11:
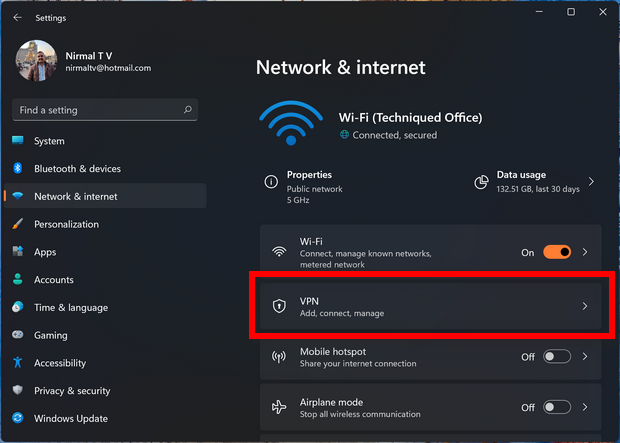
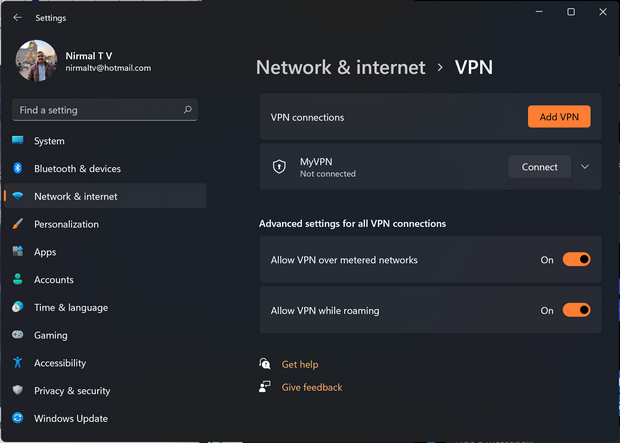
Step 1: To create a VPN, from open Settings menu in Windows 11 and navigate to Network and Internet option on the left side. On the right side you can see VPN option.
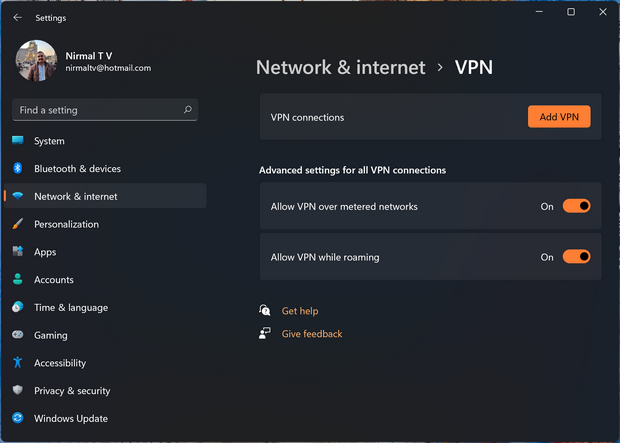
Step 2: Once you select the VPN option, here you will see a button “Add VPN”
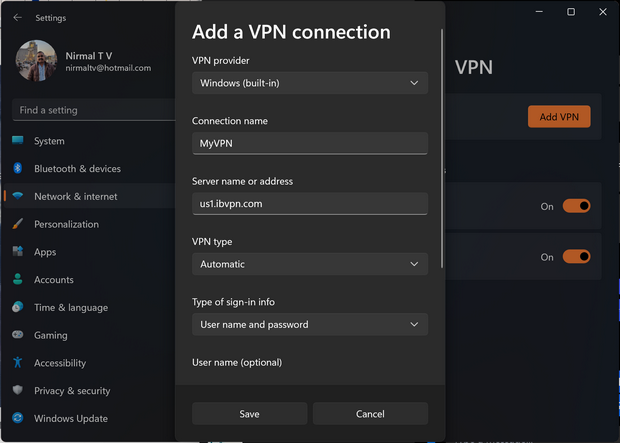
Step 3: This will pop up the Add a VPN connection setting. Here there are few parameters to set.
Step 4:
- VPN Provider- Default Windows (Built-in)
- Connection name: This is the name used to identify the VPN, you can give any name.
- Server name or address: This is provided by the VPN company and they might be having multiple locations, enter any of the server locations of the service provider.
- VPN Type: Automatic
- Type of Sign-in info: If it is a free connection without any user name or password, you can leave rest of the boxes blank. If it has a user name and password, use it in the boxes below. There is also option to use smart card.
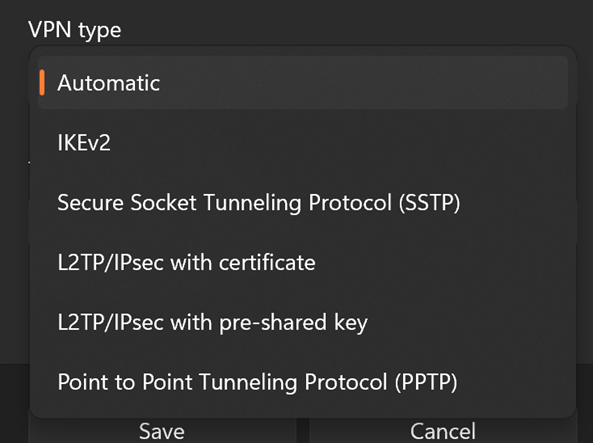
If you want to select the VPN type, there is a drop box for it.
Step 5: Once you have added the VPN, you can see it listed under the VPN connections. You can click the connect button to start browsing with VPN mode.
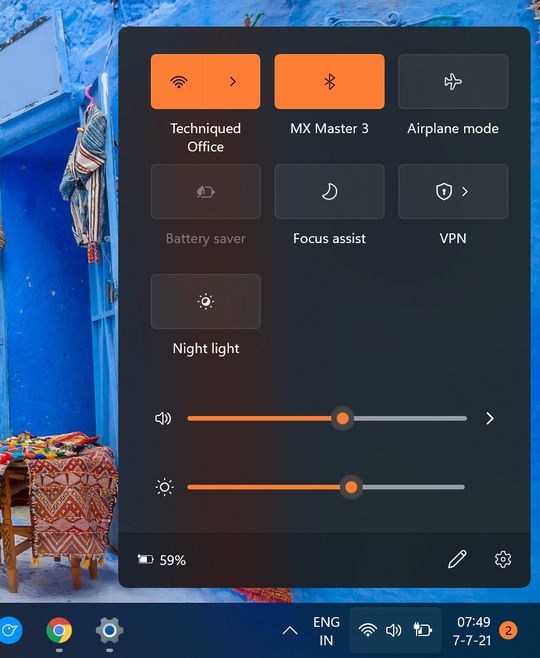
Step 6: You can also connect the VPN from quick settings panel available in the taskbar.
Now you can start browsing and access the websites blocked using the VPN on Windows 11.




I can setup my VPN connection and connect successfully thru. this guide. Thanks.
Then I found that the VPN connection will be disconnect after a period of time that I may not be using the network) then I have to re- connect the VPN manually every time I resume my work on the computer.
Is there a way to se the VPN connection to be alive all the time?
Thanks.