Techniqued- Technoloy, Review and Tutorials
  • Android
  • Freewares
  • Tutorial
  • Windows 11
  • macOS
No Result
View All Result
Techniqued- Technoloy, Review and Tutorials
  • Android
  • Freewares
  • Tutorial
  • Windows 11
  • macOS
No Result
View All Result
Techniqued- Technoloy, Review and Tutorials
No Result
View All Result

How to Edit Quick Settings in Windows 11

Nirmal by Nirmal
July 1, 2021
in Tips and Tricks, Windows 11
0
Share on FacebookShare on Twitter

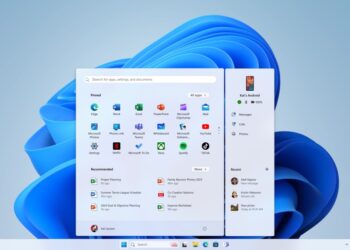
Microsoft has announced the latest version of their Windows OS, the Windows 11. Windows 11 comes with new features, UI improvements, and also performance improvements. Microsoft has also released the new Windows 11 for Insider program and it can be downloaded now. Windows 11 comes with a major overhaul in terms of UI, right from the start menu to taskbar, settings panel, file manager, context menu, and more. One of the changes to Windows 11 is how the quick settings is designed. The new quick settings panel looks refreshing and well-designed. While there are few controls that can be accessed by default, you can also edit quick settings in Windows 11 to suit your work, here is how to do it.

Edit Quick Settings in Windows 11

Related Reading:

  • How to Upgrade to Windows 11 from Windows 10
  • How to Customize the Context Menu in Windows 10 [Right Click Menu]

How to Edit Quick Settings in Windows 11:

Step 1: When you open the quick settings in Windows 11, you can see an edit icon next to the settings icon, click on this.

Step 2: Now the quick settings will be in edit mode. Here you can unpin any of the current options available in quick settings. To add a new entry, click on the add button.

Edit Quick Settings in Windows 11

Step 3: Now you will see the option to select the quick settings, which are available in Windows 11. You just have to select the items from the list and they will be added.

Edit Quick Settings in Windows 11

Step 4: Once you are added, you can also drag and rearrange the items to your liking. Once you are done with all the changes, click on the done button. Your changes are saved.

Screenshot (63)

Step 5: Now you can see the quick settings with the changes you have made.

Screenshot (64)

Tags: TutorialsWindows 11
ShareTweetSendSend
Previous Post

List of Processors Supported by Windows 11

Next Post

How to Reclaim Hard Disk Space after Upgrading to Windows 11

Related Posts

Windows 11

How to Fix “Installation can’t continue” when trying to Update Nvidia Graphics Drivers

October 8, 2024
Windows 11

Download Windows 11 24H2 ISO (Offline Installer)

October 7, 2024
Tips and Tricks

Can I Run Windows 11 without Activating

June 14, 2024
Windows 11

How to Use Energy Saver on Windows 11

May 15, 2024
Social Networks

How to Change your Instagram Name

May 12, 2024
Social Networks

How To View Your Instagram Reels Watch History

May 11, 2024

Leave a Reply Cancel reply

Your email address will not be published. Required fields are marked *

This site uses Akismet to reduce spam. Learn how your comment data is processed.


Latest Articles

How to Fix “Installation can’t continue” when trying to Update Nvidia Graphics Drivers

Download Windows 11 24H2 ISO (Offline Installer)

Can I Run Windows 11 without Activating

How to Use Snapchat on PC

How to Delete YouTube Search and Watch History on iPhone

How to Use Energy Saver on Windows 11

Techniqued- Technoloy, Review and Tutorials

© 2021 Techniqued - Technology, Tips, Tricks and Reviews

Navigate Site

  • About Us
  • Advertise with us
  • Contact Us
  • Copyright Policy
  • Disclaimer

Follow Us

No Result
View All Result
  • Android
  • Freewares
  • Tutorial
  • Windows 11
  • macOS

© 2021 Techniqued - Technology, Tips, Tricks and Reviews

This website uses cookies. By continuing to use this website you are giving consent to cookies being used. Visit our Privacy and Cookie Policy.