When you buy a new laptop or a new desktop, you might know that you get just one partition in the hard disk. You can create partitions in your Windows 11 using the method we have already covered. Windows 11 comes with a default option to manage hard disks where you can create, delete, extend, shrink, and resize partitions. If you have created partitions and want to delete them, Windows 11 offers an easy option to delete partitions without using the partition manager. Here is how to do it.
Related Reading: How to Partition Hard Disk in Windows 11 [Tutorial]

How to Delete Drive Partition in Windows 11:
If you want to delete your drive partition at any time, you can use the default options available in Windows 11. Please note that you will not be able to delete all the partitions as some of the system partitions cannot be deleted using this method. Here is how to do it.
Step 1: Open the Settings app on your Windows 11.
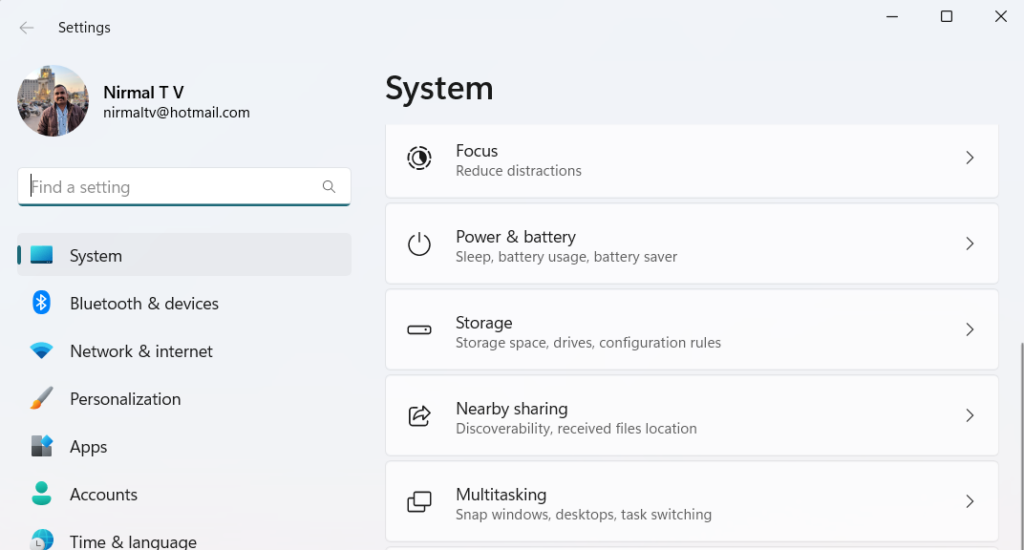
Step 2: Select System settings on the left side and scroll down on the right panel and you will be able to see the Storage option.
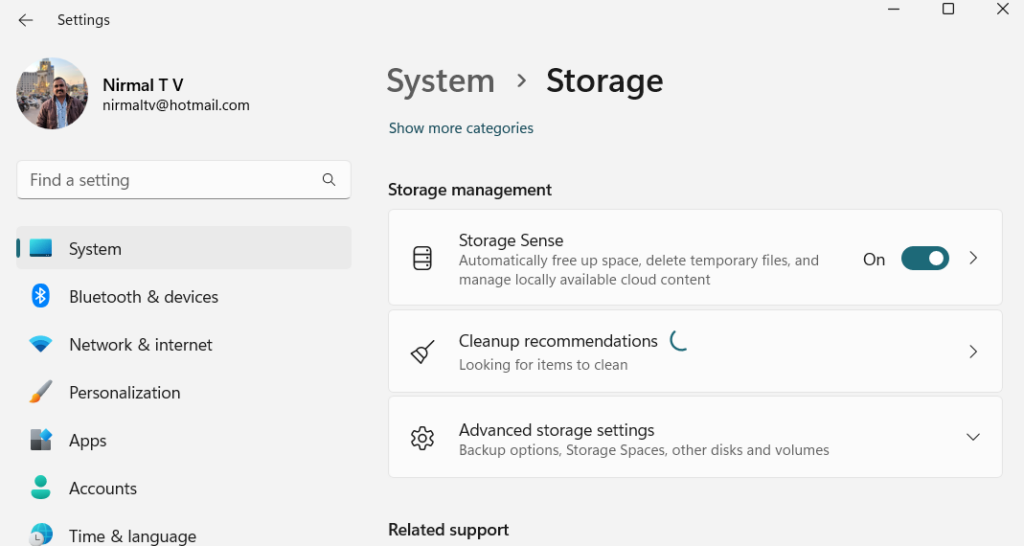
Step 3: When you select the storage option, you will see additional options available to manage storage. Scroll down and you will be able to see Advanced Storage Settings.
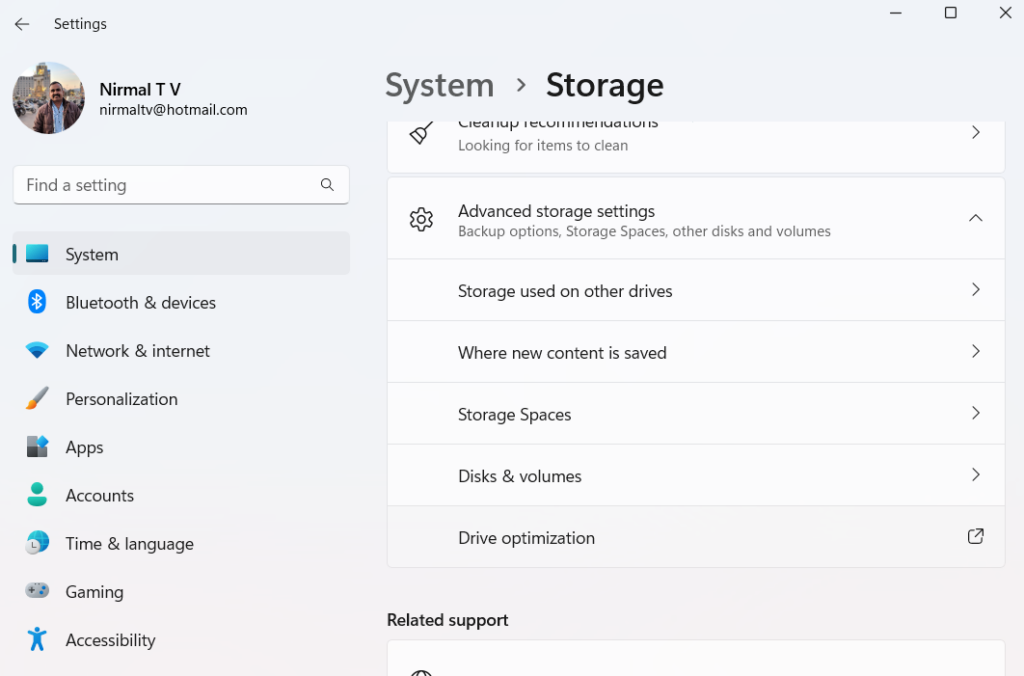
Step 4: In the additional storage settings, you will be able to see the Disk and volumes option when you expand or click it.
Step 5: Now you will be able to see all the drives available in your hard disk with all the properties. You will also be able to see the type of partition and its health. Click on the properties button of the drive you want to delete.
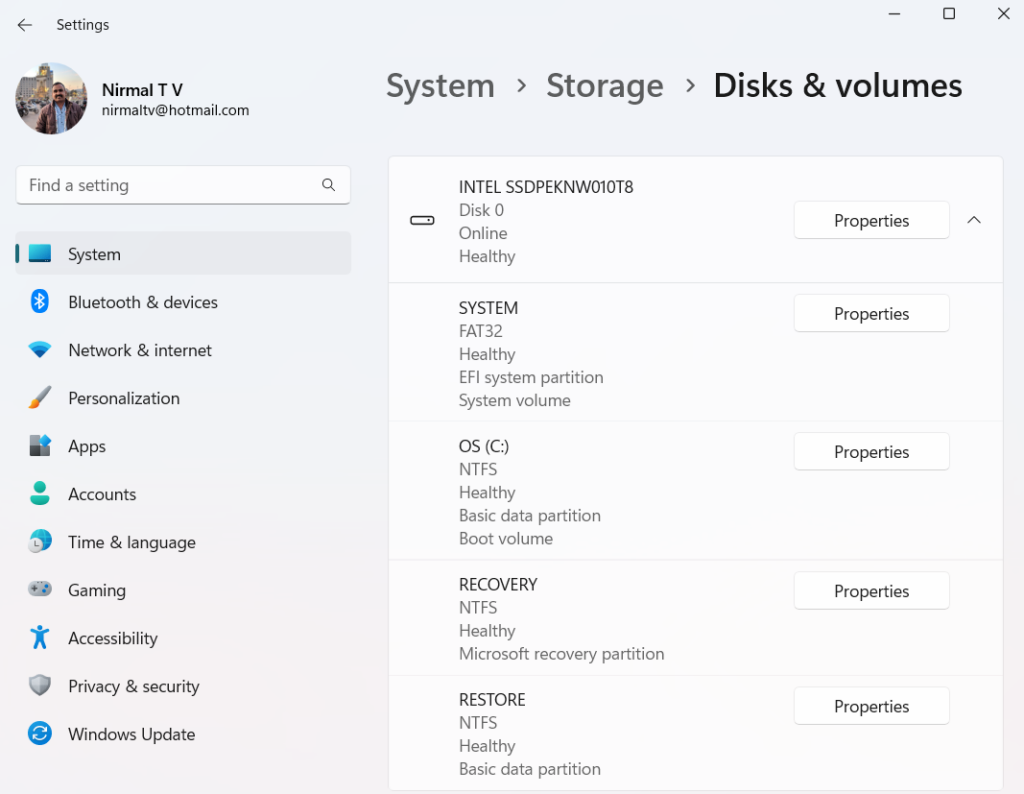
Step 6: If the partition you have selected can be deleted, you will see the option (or button) to delete the partition listed under the Format option.
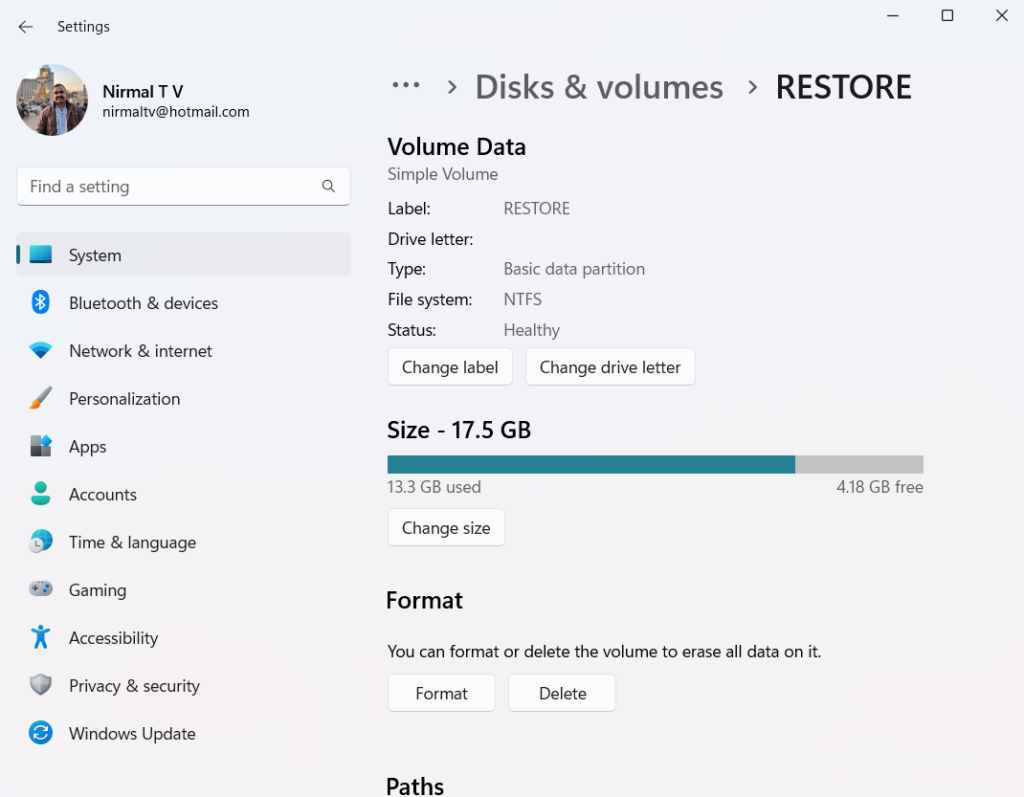
Step 7: You can click on the delete button to delete the partition and this will erase all the data in the partition and the space will be available for creating a new partition.
Please make sure you have taken a backup of all the files in the partition before you hit the delete button in the settings.

