Techniqued- Technoloy, Review and Tutorials
  • Android
  • Freewares
  • Tutorial
  • Windows 11
  • macOS
No Result
View All Result
Techniqued- Technoloy, Review and Tutorials
  • Android
  • Freewares
  • Tutorial
  • Windows 11
  • macOS
No Result
View All Result
Techniqued- Technoloy, Review and Tutorials
No Result
View All Result

How to Make Windows 11 Boot Faster

Nirmal by Nirmal
January 1, 2023
in Tips and Tricks, Windows 11
0
Share on FacebookShare on Twitter

When you install Windows 11 on your laptop or desktop, it is optimized for the best performance. This is the same case when you buy a new laptop with Windows 11. But over a period of usage, you might have added or installed a lot of applications on your PC. Some of these applications are automatically added to Windows 11 startup even though they might not be required at startup. This, in turn, has two issues, the application startup slows down your Windows boot-up, and secondly, the application is unnecessarily started and running in the background even though you might not be using it. So how to make Windows 11 boot faster?

Make Windows 11 Boot Faster

Related Reading: How to Set Data Usage Limits in Windows 10

How to Make Windows 11 Boot Faster:

In order to manage Windows 10 startup, you need to open task manager. Follow the steps below.

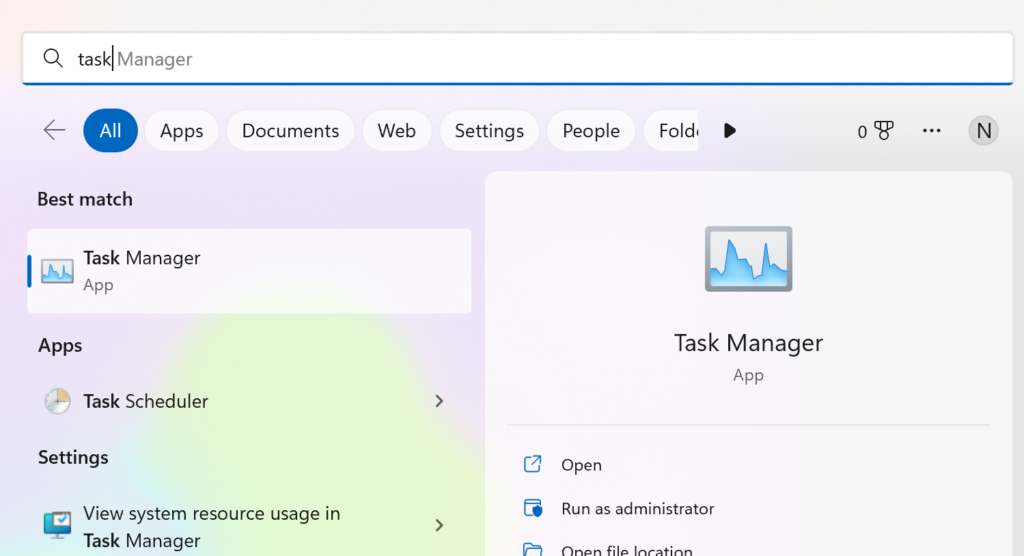
Step 1. To open task manager, click on the start menu and type task manager and you will see the task manager in the search result and click on it.

Make Windows 11 Boot Faster

Step 2. In the task manager, you will see a sidebar and multiple tabs. Here you need to select “Startup Apps”. This is the 4th item in the sidebar.

Make Windows 11 Boot Faster

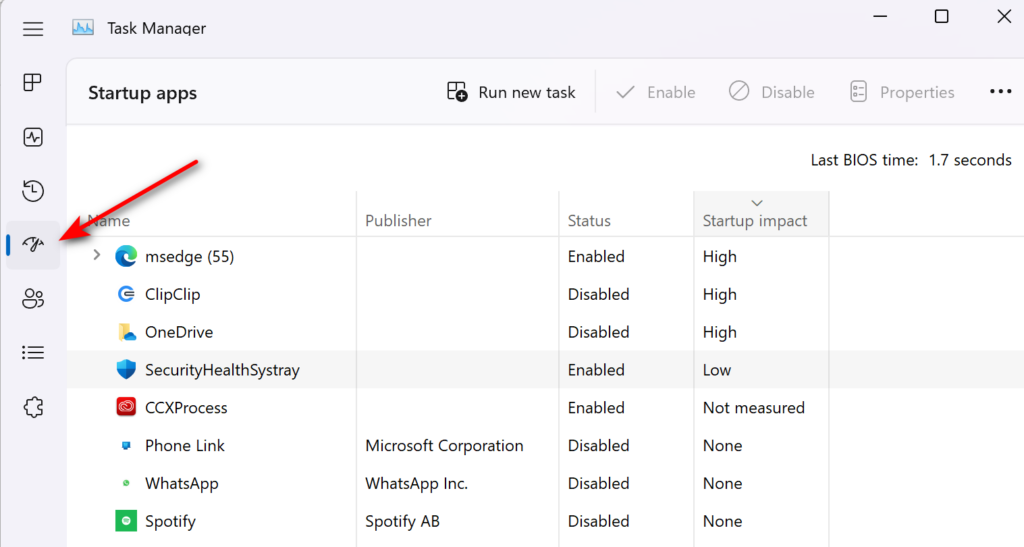
Step 3. Now select the Startup tab from the task manager. Here you will see the list of all apps which are started when Windows 11 boots.

Step 4. If you see any unwanted apps in the startup list, you can simply right-click on the entry and select disable.

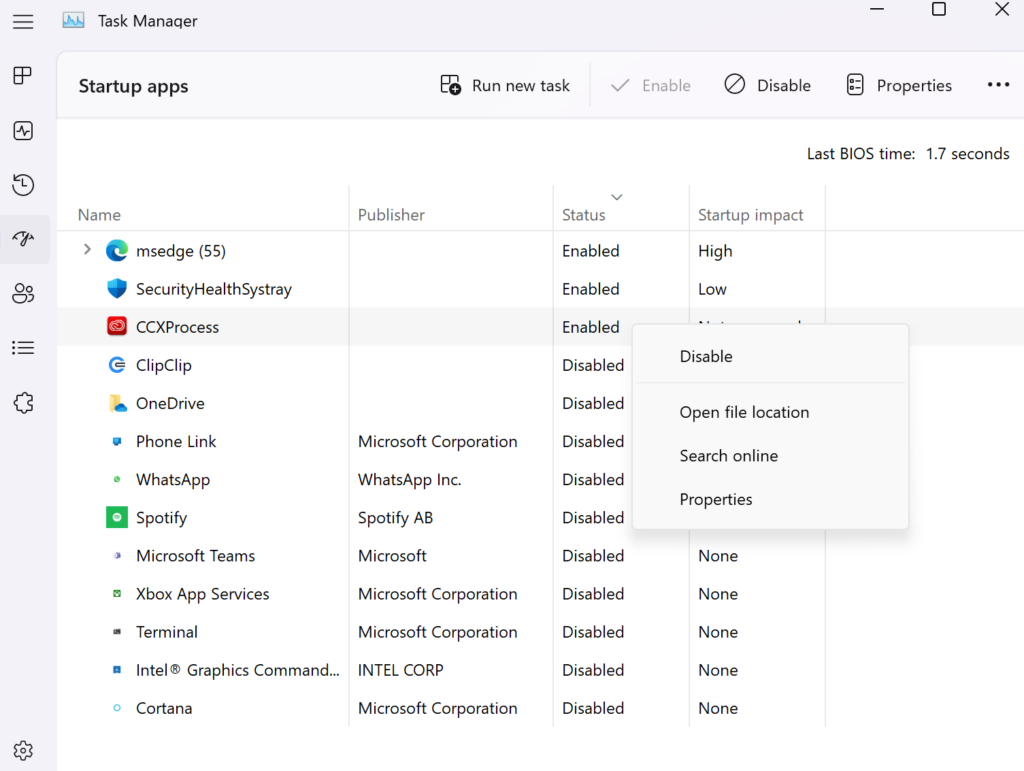
Step 5. Once you have clicked disable, the app will be removed from the startup, but it will remain on the list, and will no longer launch automatically when your PC is switched on. If you want to enable it again just right-click on it and select Enable.

Once you clean up the startup list, you will be able to see improved performance in the startup time for your Windows 11. It is advised to check Windows 11 startup once in a while to see if there are new applications added to the list.

Tags: How toWindows 11
ShareTweetSendSend
Previous Post

How to Share Old Instagram Stories with Friends

Next Post

How to Clear Space Occupied by File Provider Ingest Folder in macOS

Related Posts

Windows 11

How to Fix “Installation can’t continue” when trying to Update Nvidia Graphics Drivers

October 8, 2024
Windows 11

Download Windows 11 24H2 ISO (Offline Installer)

October 7, 2024
Tips and Tricks

Can I Run Windows 11 without Activating

June 14, 2024
Windows 11

How to Use Energy Saver on Windows 11

May 15, 2024
Social Networks

How to Change your Instagram Name

May 12, 2024
Social Networks

How To View Your Instagram Reels Watch History

May 11, 2024

Leave a Reply Cancel reply

Your email address will not be published. Required fields are marked *

This site uses Akismet to reduce spam. Learn how your comment data is processed.


Latest Articles

How to Fix “Installation can’t continue” when trying to Update Nvidia Graphics Drivers

Download Windows 11 24H2 ISO (Offline Installer)

Can I Run Windows 11 without Activating

How to Use Snapchat on PC

How to Delete YouTube Search and Watch History on iPhone

How to Use Energy Saver on Windows 11

Techniqued- Technoloy, Review and Tutorials

© 2021 Techniqued - Technology, Tips, Tricks and Reviews

Navigate Site

  • About Us
  • Advertise with us
  • Contact Us
  • Copyright Policy
  • Disclaimer

Follow Us

No Result
View All Result
  • Android
  • Freewares
  • Tutorial
  • Windows 11
  • macOS

© 2021 Techniqued - Technology, Tips, Tricks and Reviews

This website uses cookies. By continuing to use this website you are giving consent to cookies being used. Visit our Privacy and Cookie Policy.