There might be instances when you have a lot of personal files in your documents or other folders in your Windows 11 PC and then one day Windows fails to start. In such cases, a backup copy of these files might become really helpful. But instead of a manual backup, an automated backup to an external drive or a networked location is much better. Windows 11 provides many new features and one of them is File History. While File History is not a new feature of Windows 11, it is quite a useful feature that allows you to take automatic backups of your personal files. So let us see how to enable automatic File Backup in Windows 11.
Related Reading: How to Back up your BitLocker Recovery Key in Windows 11
How to Enable Automatic File Backup in Windows 11:
File History feature can back up all your documents, browser favorites, desktop icons, and other personal files, and once activated, it can run in the background at regular intervals.
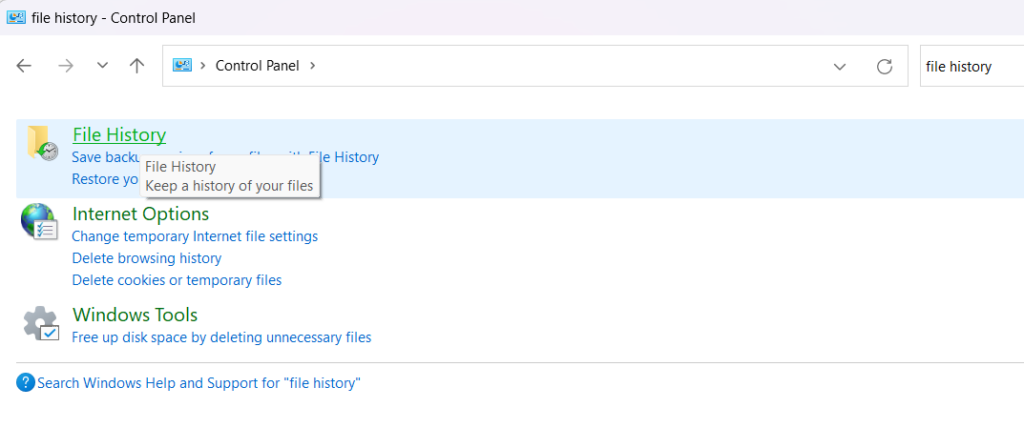
Step 1: To start using the File History, open Control Panel and search for the file history option.
Step 2: Select the File History option and it will be in a disabled state. You will need to either connect an external drive or a networked location to enable File history.
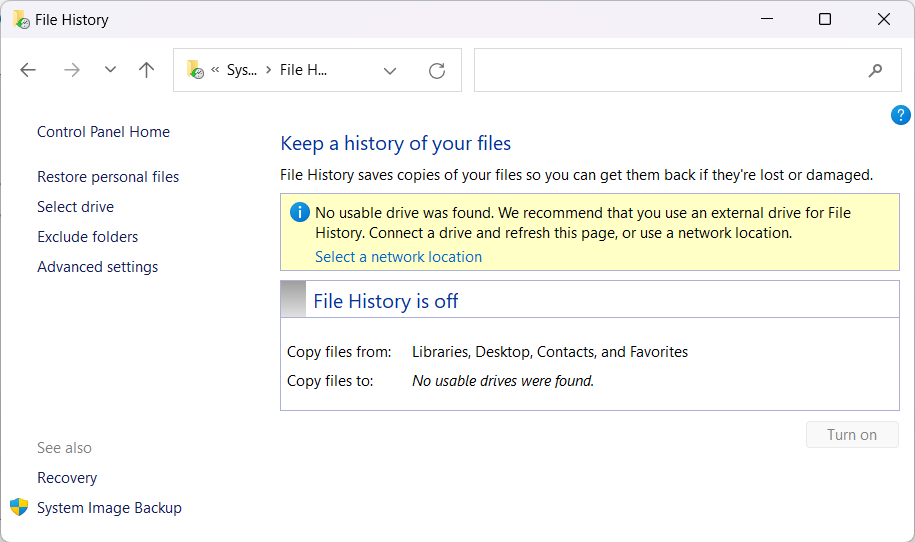
Step 3: We have selected a network location to save all the files, but you can also use an external hard disk.
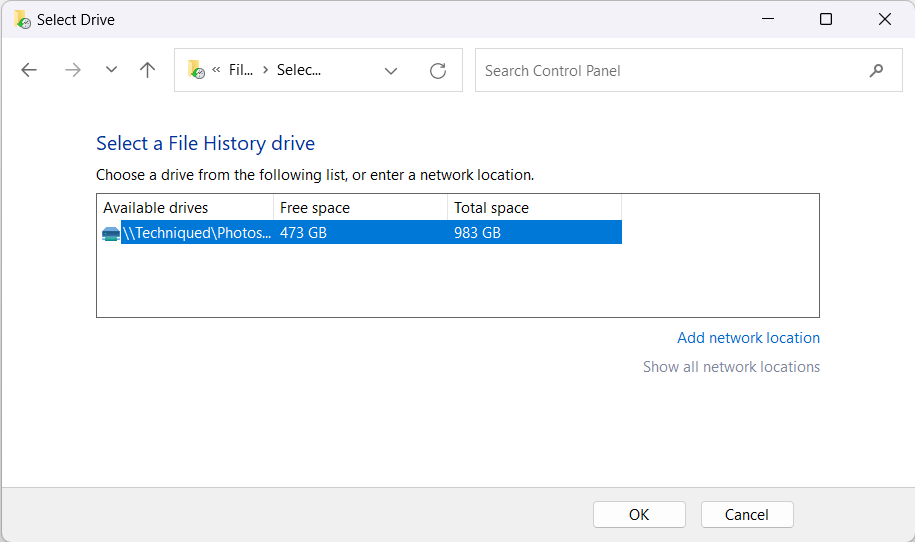
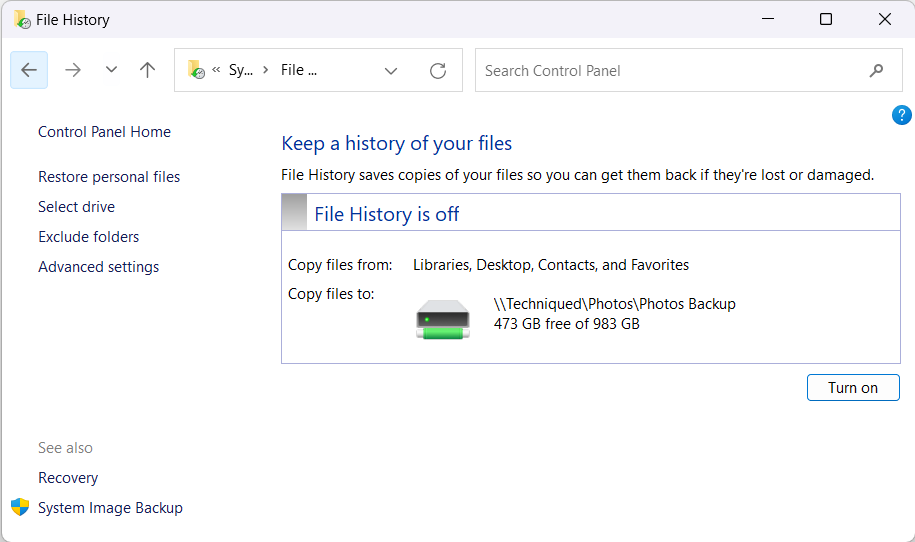
Step 4: Once you set the location, you will now be able to see the button to Turn on File History.
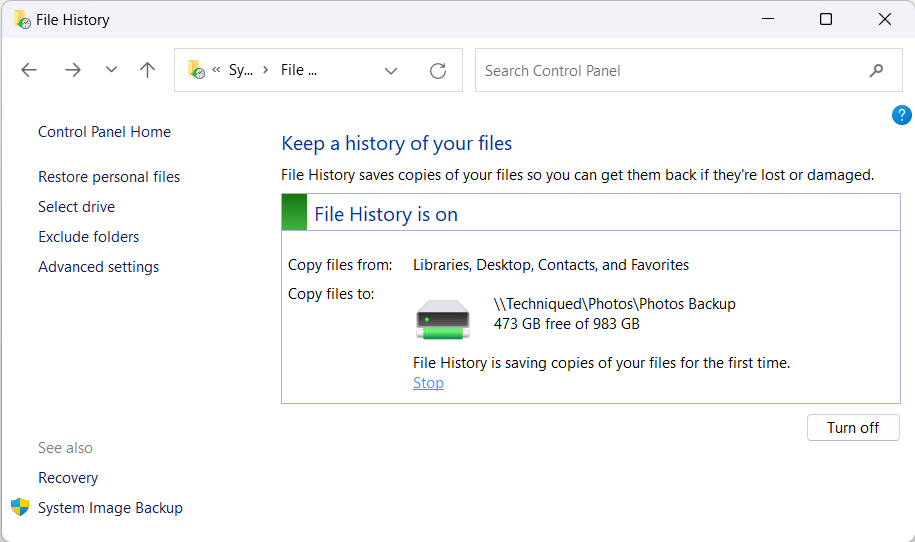
Step 5: Once the File History is turned on, Windows 11 will take a backup of all your personal files. On the left side, you will be able to exclude any folders you wish not to back up in the File History.
Step 6: When you click on the Advanced Settings in the left sidebar, you can set the time interval between the backups. You can also select how long you want the saved version to be kept.
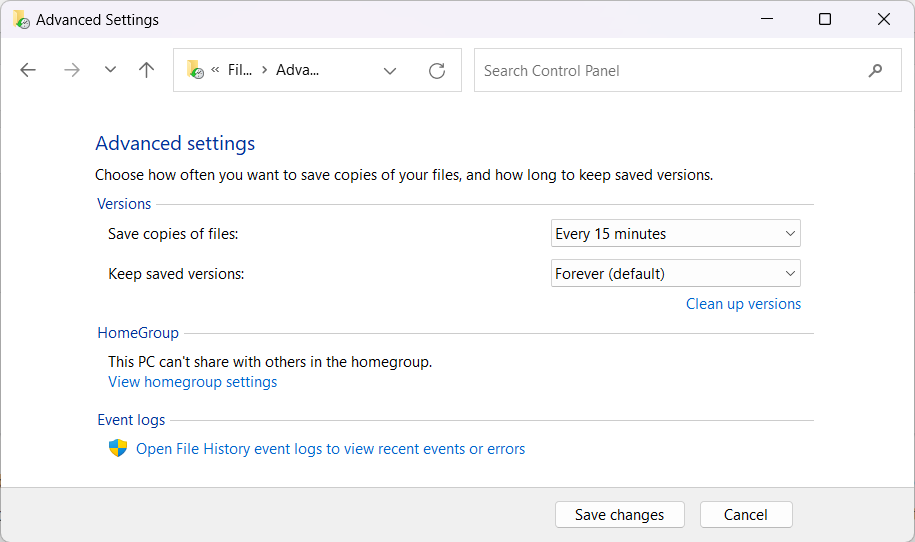
Once you have enabled this option, your personal files will be backed up at regular intervals set by you. In case you have any issues in accessing your personal files, you can always restore from the File History backup.


