The Domain Name System or DNS is a hierarchical and distributed naming system for computers, services, and other resources in the Internet or other Internet Protocol networks. If you are using Windows PC, then issues with DNS on Windows are pretty common. Because of the DNS issue, you may not be able to connect your PC to the internet or use any apps which require an internet connection. There are various types of DNS errors on Windows 11. So in case you are facing issues, here is how to fix DNS issues in Windows 11.
Related Reading: How to Reset Hosts File in Windows 11

There are various methods to fix the DNS issues in Windows 11, let’s check them out one by one.
Flush the DNS Cache:
One of the solutions to this issue is to flush the DNS cache on your Windows 11 PC. Flushing the DNS cache fixes most of the DNS-related issues without impacting the personal data you’ve stored on your computer. To flush the DNS, follow the steps below.
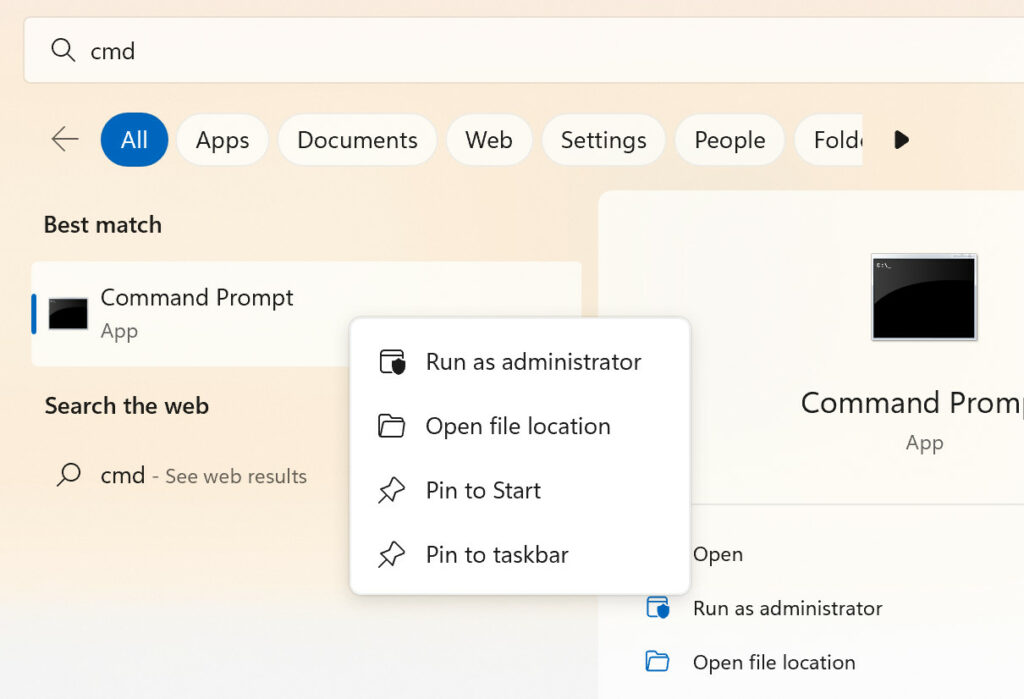
Step 1: Open the start menu and type cmd.
Step 2: From the results, you will see the command prompt, now right click on it and select the Run as Administrator option.

Step 3: Now in the command prompt, type these commands listed below one by one and press enter.
ipconfig /flushdns
ipconfig /registerdns
ipconfig /release
ipconfig /renew
netsh winsock reset catalog
netsh int ipv4 reset reset.log
netsh int ipv6 reset reset.log
These steps will flush the DNS cache and your issue will the fixed.
Restart the Router:
Sometimes, the issue with DNS can be easily fixed by rebooting the router at your home or office. In order to reboot the router, you need to login to your router page, the username and password for admin will be mentioned in your router. Once you have logged in, you will be able to see an option to restart the router, this interface will be different for different router brands.
Use Another DNS server:
If you are still facing issues, then it is better to try another DNS server to connect. It is better to try open DNS or a Google DNS server. Here is how to change the DNS server.
Step 1: Open the control panel in Windows 11, you can type control panel in the start menu and press enter.
Step 2: Now you need to select Network and Internet-> Network and Sharing Center-> Change adapter settings.
Step 3: Now you need to right-click on your network and select properties.
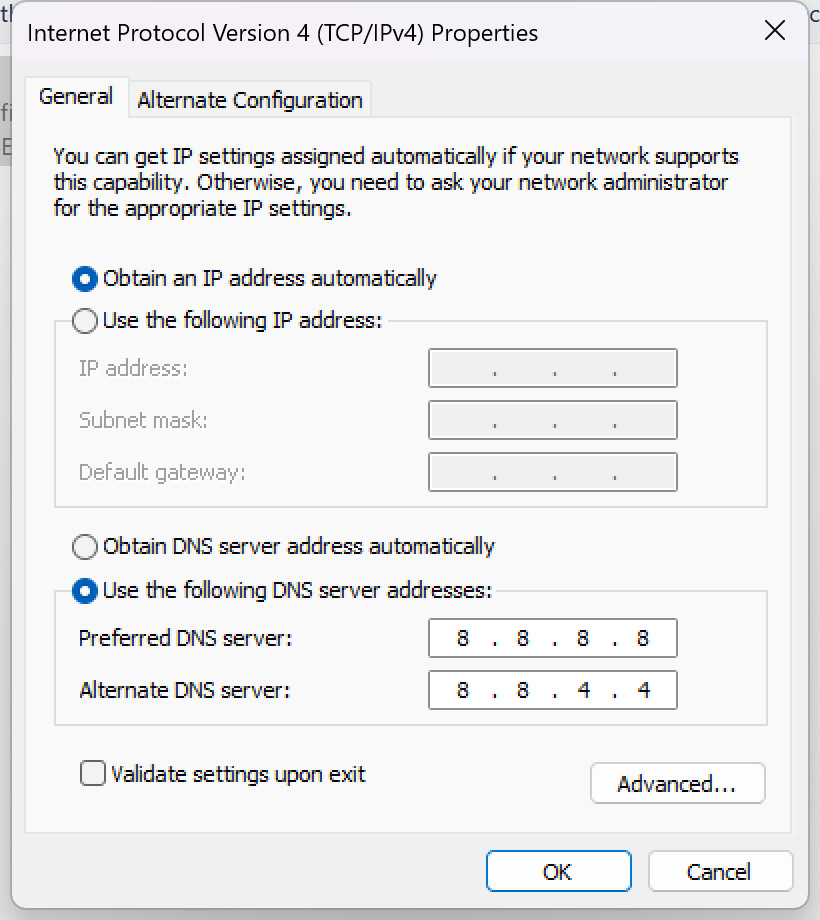
Step 4: Select Internet Protocol Version 4 (TCP/IPv4) from the list and click on the Properties button.
Step 5: Here you will see an option to set the DNS server.

Step 6: You need to use Google’s DNS servers by entering 8.8.8.8 in the Preferred DNS server field and typing 8.8.4.4 in the Alternate DNS server field. Now click the OK button and you are good to go.


