Techniqued- Technoloy, Review and Tutorials
  • Android
  • Freewares
  • Tutorial
  • Windows 11
  • macOS
No Result
View All Result
Techniqued- Technoloy, Review and Tutorials
  • Android
  • Freewares
  • Tutorial
  • Windows 11
  • macOS
No Result
View All Result
Techniqued- Technoloy, Review and Tutorials
No Result
View All Result

How to Change Display Refresh Rate in Windows 11

If your laptop supports higher refresh rates, you can change it in Windows 11

Nirmal by Nirmal
July 24, 2021
in Windows 11
0
Share on FacebookShare on Twitter

The refresh rate of the display is the number of times per second that the image refreshes on the screen. We have seen a higher refresh rate in smartphones and this is now becoming a trend in laptops too. We have a lot of gaming laptops with higher refresh rates being offers. For example, a 60Hz display will update the screen 60 times per second. Laptop displays are now coming with more than 300hz display as well. The refresh rate determines how smoothly motion appears on your screen. For example, if you’re playing a game that has a lot of fast-moving action, a higher refresh rate can help improve the experience. So how do you change display refresh rate in Windows 11? Let’s find out.


How to Change Display Refresh Rate in Windows 11:

A higher refresh rate can also reduce battery life because it uses more power. So if you’re using a laptop or tablet and want to save some battery, you could lower the refresh rate.

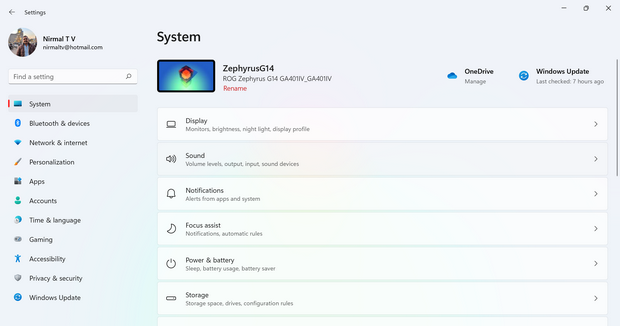
Step 1: Open the settings panel in Windows 11.

Step 2: Under the System settings, select Display settings.

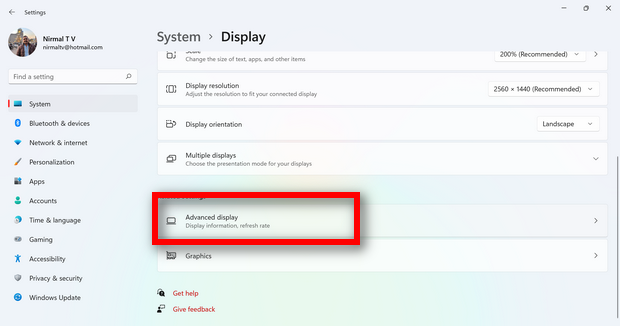
Step 3: Under the display settings, scroll down and you will see the Advanced Display option.

Change Display Refresh Rate in Windows 11

Step 4: In the advanced settings, you will be able to see a drop-down list with refresh rates available for the display.

Change Display Refresh Rate in Windows 11

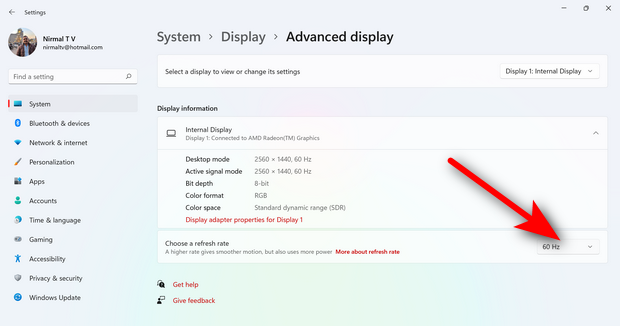
The refresh rates that appear depend on your display and what it supports. Select laptops and external displays will support higher refresh rates.


Tags: Windows 11
ShareTweetSendSend
Previous Post

How to Find Data Usage in Windows 11 and How to Set a Limit

Next Post

How to Use Microsoft Teams on Windows 11

Related Posts

Windows 11

How to Fix “Installation can’t continue” when trying to Update Nvidia Graphics Drivers

October 8, 2024
Windows 11

Download Windows 11 24H2 ISO (Offline Installer)

October 7, 2024
Tips and Tricks

Can I Run Windows 11 without Activating

June 14, 2024
Windows 11

How to Use Energy Saver on Windows 11

May 15, 2024
Windows 11

4 Ways to Open Windows Explorer in Windows 11

May 7, 2024
Windows 11

How to Open and Create 7z and TAR File in Windows 11 Natively

November 30, 2023

Leave a Reply Cancel reply

Your email address will not be published. Required fields are marked *

This site uses Akismet to reduce spam. Learn how your comment data is processed.


Latest Articles

How to Fix “Installation can’t continue” when trying to Update Nvidia Graphics Drivers

Download Windows 11 24H2 ISO (Offline Installer)

Can I Run Windows 11 without Activating

How to Use Snapchat on PC

How to Delete YouTube Search and Watch History on iPhone

How to Use Energy Saver on Windows 11

Techniqued- Technoloy, Review and Tutorials

© 2021 Techniqued - Technology, Tips, Tricks and Reviews

Navigate Site

  • About Us
  • Advertise with us
  • Contact Us
  • Copyright Policy
  • Disclaimer

Follow Us

No Result
View All Result
  • Android
  • Freewares
  • Tutorial
  • Windows 11
  • macOS

© 2021 Techniqued - Technology, Tips, Tricks and Reviews

This website uses cookies. By continuing to use this website you are giving consent to cookies being used. Visit our Privacy and Cookie Policy.