Techniqued- Technoloy, Review and Tutorials
  • Android
  • Freewares
  • Tutorial
  • Windows 11
  • macOS
No Result
View All Result
Techniqued- Technoloy, Review and Tutorials
  • Android
  • Freewares
  • Tutorial
  • Windows 11
  • macOS
No Result
View All Result
Techniqued- Technoloy, Review and Tutorials
No Result
View All Result

How to Create a “Windows To Go” Bootable USB Drive

Nirmal by Nirmal
August 16, 2012
in Windows 8
1
Share on FacebookShare on Twitter

Windows 8 Enterprise version has a new feature called “Windows to Go” and we had detailed about this feature. This feature allows Windows 8 Enterprise to boot and run from USB storage drives like pen drive without having to install it. In fact, It is a fully manageable corporate Windows 8 environment. This feature is intended to allow enterprise administrators to provide users with an imaged version of Windows 8 that reflects the corporate desktop and as such is aimed at enterprises.

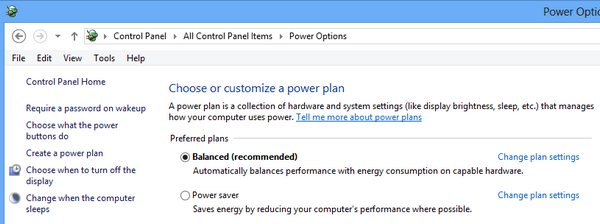
For creating a Windows To Go drive, Microsoft has provided a neat interface. Open Control Panel and select All control panel items. You can see Windows To Go option.

Windows To Go

The first step is to select the USB drive on which you want to create the bootable USB. Minimum space required is 32GB, so make sure that you have a 32GB or more USB pen drive. You can also install on external drives which are more than 32GB connected through USB.

Windows To Go

The list of all connected USB drives will be listed and you can select the one which you want to use.

Bitocker

You can also set up BitLocker encryption for your USB drive and if you set it up, you will need to enter the password every time you use the workspace. You can skip this step in case you do not need encryption.

Windows image

In the next step you need to locate the Enterprise image which contains the OS and the app files.

Windows 8 image

Search for the image, then select the image and click next.

format and booting

In the final step, you will be creating the Windows To Go workspace. Please note that the USB drive will be formatted and any data on it will be deleted. So make sure you have the backup of all the data in the USB drive.

Requirements:
  • Windows 8 Enterprise
  • USB drive with 32GB (min) storage
  • USB 2.0 or USB 3.0 supported
Tags: Bootable USBTutorialsWindows 8Windows 8 USBWindows To Go
ShareTweetSendSend
Previous Post

How to Upgrade Windows XP, Vista and Windows 7 to Windows 8

Next Post

Get Chrome Like Tabs in Windows Explorer

Related Posts

Tips and Tricks

Fix DNS Server not Responding Error on Windows 10

March 5, 2021
Windows 10

6 Simple Tips to Improve Battery on Windows 10

March 5, 2021
Windows 10

Where can I Download Windows Legally

April 15, 2020
Tips and Tricks

Fix Mouse not Detected on Windows 10

November 17, 2019
Windows 10

How to Fix USB Device Not Recognized on Windows 10

November 11, 2019
Tutorial

How to Create a Network Bridge in Windows 10

November 11, 2019

Comments 1

  1. Jon says:
    13 years ago

    What are the minimum requirements for the computer that boots into Windows 8 from USB?

    Reply

Leave a Reply Cancel reply

Your email address will not be published. Required fields are marked *

This site uses Akismet to reduce spam. Learn how your comment data is processed.


Latest Articles

How to Fix “Installation can’t continue” when trying to Update Nvidia Graphics Drivers

Download Windows 11 24H2 ISO (Offline Installer)

Can I Run Windows 11 without Activating

How to Use Snapchat on PC

How to Delete YouTube Search and Watch History on iPhone

How to Use Energy Saver on Windows 11

Techniqued- Technoloy, Review and Tutorials

© 2021 Techniqued - Technology, Tips, Tricks and Reviews

Navigate Site

  • About Us
  • Advertise with us
  • Contact Us
  • Copyright Policy
  • Disclaimer

Follow Us

No Result
View All Result
  • Android
  • Freewares
  • Tutorial
  • Windows 11
  • macOS

© 2021 Techniqued - Technology, Tips, Tricks and Reviews

This website uses cookies. By continuing to use this website you are giving consent to cookies being used. Visit our Privacy and Cookie Policy.