Outlook is the most popular email app used by millions of users across different platforms. It was initially available for Windows and then macOS, Android, and even iOS are available. If you are on Windows or macOS, you will need a subscription to use Outlook. Outlook for macOS comes loaded with features and also has a clean and clutter-free UI. Outlook for macOS also comes with different modes including light mode, dark mode, and colors based on the system colors. So how do you enable Outlook dark mode on macOS, let us find out in this article?
Related Reading: How to Enable Read Receipts in Outlook [Windows and macOS]

How to Enable Outlook Dark Mode on macOS:
Step 1: Open Outlook on your macOS and click on the Outlook button on the top-left corner of the app.
Step 2: From the menu, you need to select Preferences.
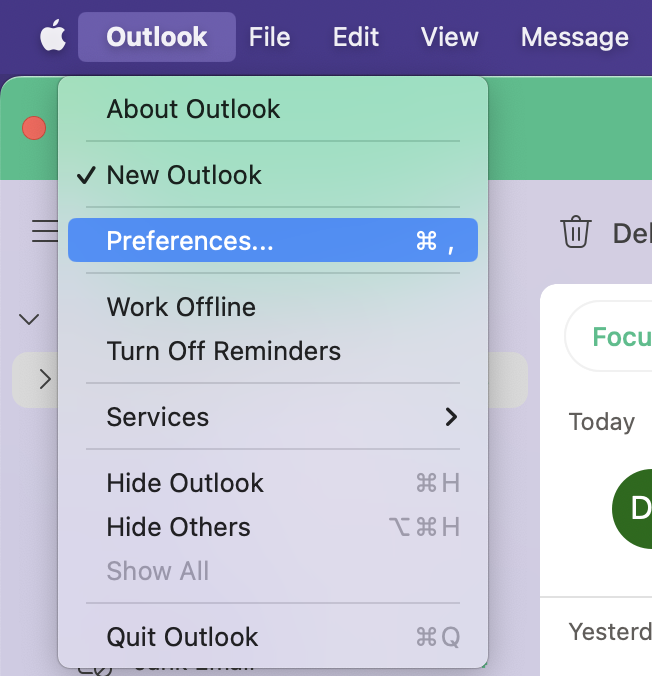
Step 3: This will open the Outlook Preferences menu and you will be able to see a lot of options listed. Here you need to select General settings under Personal settings.
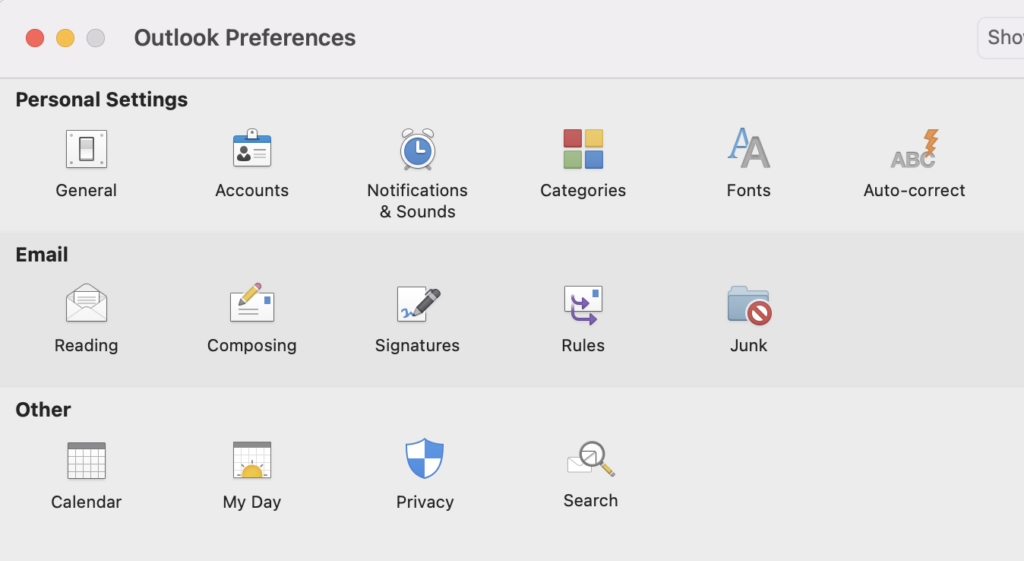
Step 4: Under the General settings, you will be able to see the Appearances menu. Here you can select either Dark or the system option. If you select the system option, the Outlook theme will be changed based on the light or dark mode of the device.
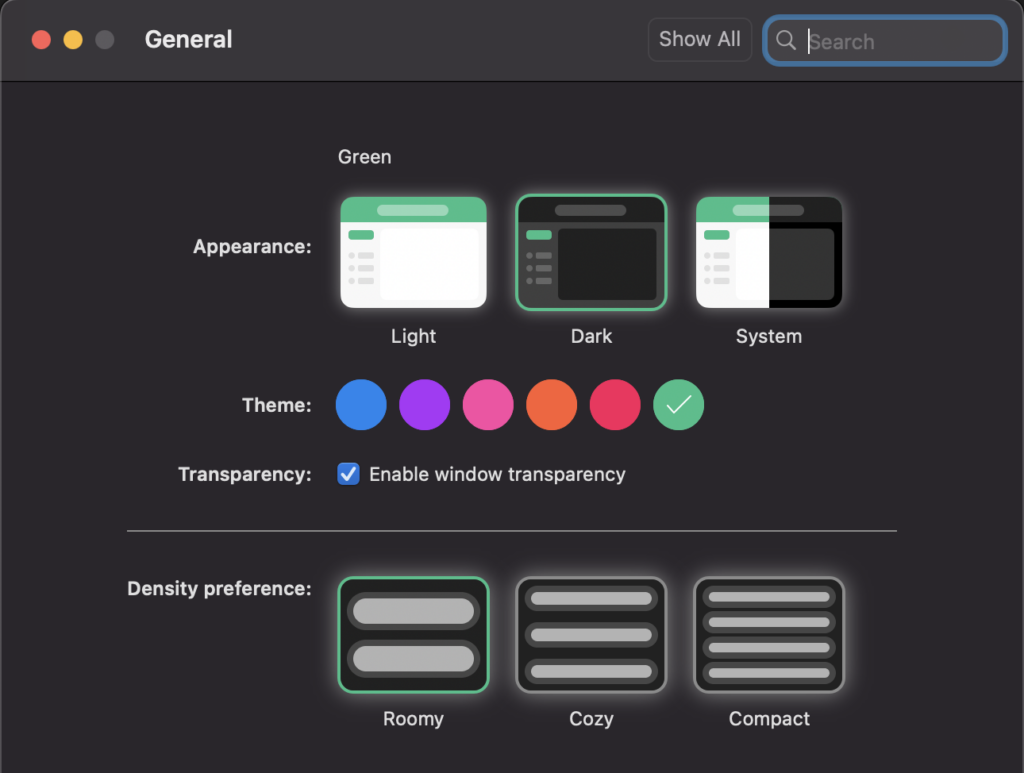
Now you will have the dark mode implemented on Outlook on macOS.


