If you have been using it for quite a long time, then you might be already aware of BitLocker encryption on Windows. BitLocker is a full-volume encryption feature included with Windows versions starting with Windows Vista. It is designed to protect data by providing encryption for entire volumes. By default, it uses the AES encryption algorithm in cipher block chaining or XTS mode with a 128-bit or 256-bit key. Similar to previous versions, Windows 11 also features this option. So let us see how to enable BitLocker on Windows 11.
How to Enable BitLocker on Windows 11:
BitLocker encryption can be enabled on both internal drives as well as removable drives like pen drives or external hard disks.
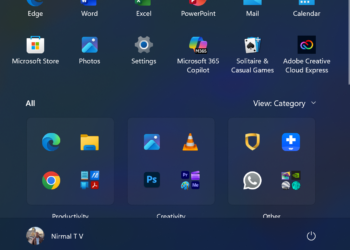
Step 1: Open the start menu on Windows 11 and type BitLocker in the search area. You will see the Manage BitLocker option, click on this.

Step 2: This will take you to the Control Panel with the option to turn on BitLocker. Here you will be able to see the drives connected and an option to enable BitLocker against the list. Click on the Turn on BitLocker link against the drive you want to encrypt.

Step 3: In the next step, you need to decide how you want to protect your drive. One of the options is to use a password and the second one is to use a smart card. We would suggest the password option. You need to enter and re-enter your password.

Step 4: In the next step, you need to backup your recovery key. You can either save it to a file or print the recovery key.

Step 5: In the next step, you need to choose the encryption type. If you are encrypting the internal drives in the PC, then you can choose the New Encryption mode. If you are going to encrypt external drives, then it is better to go with compatible mode. If you are going to use this drive on an older version of Windows (Windows 7, 8, or 8.1), then this is the best option to go with.

Step 6: The next option is to choose the amount of space to encrypt, either the entire drive or only the used up disk space.

Step 7: The next step is the final confirmation page before you start encrypting. Here you need to click on the start encrypting button.

Step 8: Now the BitLocker encryption will start and it will take some time based on the storage space and amount of space used up by the drive.

How to Access BitLocker Protected Drives:
Now that you have encrypted the drive(s) with BitLocker, how do you access them? You can access them the regular way you access any drive. Whenever you open the BitLocker protected drive, you get a prompt to enter the password.

You can enter the password you set up while encrypting the drive. If at any point, you forget the password, click on the More Options and you will see an option to enter the recovery key you saved while encrypting the drive.
How to Disable BitLocker Protection:
In order the disable the BitLocker protection, you need to open the Control Panel (as shown in step 2), and then you will see an option to disable BitLocker, against the drive you protected using BitLocker encryption. Click on the Turn off BitLocker link in the settings.

This will start the decrypting process of your drive. This will take some time based on the amount of data available in the drive.


You may be prompted to choose between using a password or a smart card to unlock your drive. Select your preferred method and follow the on-screen instructions.
I want to express my utmost gratitude to the author for their meticulous research
I want to express my utmost gratitude to the author for their meticulous research
This article supplies an in-depth and comprehensive review of the topic addressed, weaving together theoretical frameworks and practical applications to demonstrate the relevance of the subject in real-world scenarios.
Thanks for breaking down how to enable BitLocker on Windows 11! It’s such an essential feature for security these days. Protecting our data feels more important than ever, especially with everything happening online.