Techniqued- Technoloy, Review and Tutorials
  • Android
  • Freewares
  • Tutorial
  • Windows 11
  • macOS
No Result
View All Result
Techniqued- Technoloy, Review and Tutorials
  • Android
  • Freewares
  • Tutorial
  • Windows 11
  • macOS
No Result
View All Result
Techniqued- Technoloy, Review and Tutorials
No Result
View All Result

How to Upgrade to Windows 11 from Windows 10

Nirmal by Nirmal
June 24, 2021
in Tutorial, Windows 10, Windows 11
0
Share on FacebookShare on Twitter

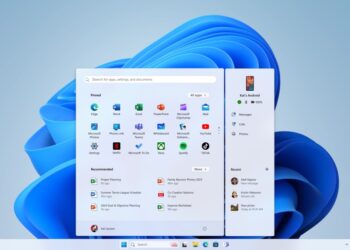
Microsoft has announced the latest version of their Windows OS, the Windows 11. Windows 11 comes with new features, UI improvements, and also performance improvements. Now, if you are already on Windows 10, you can now upgrade to Windows 11. Upgrading from Windows 10 to Windows 11 is an easy process and all you need to do is to download the ISO file. Once you have the ISO file, extract it and run the setup file and follow the steps mentioned below. Here is how to upgrade to Windows 11 from Windows 10.

Screenshot (46)

Related Reading: How to Find Windows 10 Username

How to upgrade to Windows 11 from Windows 10:

Step 1: Run the setup file and you can see this screen. This setup will guide you through the installation or upgrade to Windows 11 from Windows 10. We will update the links once Microsoft releases the public version of Windows 11.

Upgrade to Windows 11 from Windows 10

Step 2: The setup will check your PC to see if is satisfies the requirement to upgrade the PC.

Screenshot (39)

Step 3: In the next step you have to accept the license terms.

Upgrade to Windows 11 from Windows 10

Step 4: The installation will check for any new updates for the system before updating.

Upgrade to Windows 11 from Windows 10

Step 5: In the next step, Windows 11 will be ready to install. You can select to keep your personal files and apps. There is an option to change the settings for this.

Screenshot (42)

Step 6: you can keep personal files and apps or only personal files or nothing. Select the option which suits your purpose.

Screenshot (43)

Step 7: Now windows will start the installation process of Windows 11. This will take several minutes and your PC will restart multiple times. So in case you are installing it on a laptop, make sure it is connected to the charger and has a sufficient battery.

Screenshot (45)

Step 8: Once the installation is complete, you will be shown the Windows 11 home screen and the upgrade is complete.

Screenshot (46)

Tags: How toTutorialsWindows 11
ShareTweetSendSend
Previous Post

How to Customize the Context Menu in Windows 10 [Right Click Menu]

Next Post

Windows 11 System Requirements

Related Posts

Windows 11

How to Fix “Installation can’t continue” when trying to Update Nvidia Graphics Drivers

October 8, 2024
Windows 11

Download Windows 11 24H2 ISO (Offline Installer)

October 7, 2024
Tips and Tricks

Can I Run Windows 11 without Activating

June 14, 2024
Tutorial

How to Use Snapchat on PC

May 21, 2024
iOS

How to Delete YouTube Search and Watch History on iPhone

May 18, 2024
Windows 11

How to Use Energy Saver on Windows 11

May 15, 2024

Leave a Reply Cancel reply

Your email address will not be published. Required fields are marked *

This site uses Akismet to reduce spam. Learn how your comment data is processed.


Latest Articles

How to Fix “Installation can’t continue” when trying to Update Nvidia Graphics Drivers

Download Windows 11 24H2 ISO (Offline Installer)

Can I Run Windows 11 without Activating

How to Use Snapchat on PC

How to Delete YouTube Search and Watch History on iPhone

How to Use Energy Saver on Windows 11

Techniqued- Technoloy, Review and Tutorials

© 2021 Techniqued - Technology, Tips, Tricks and Reviews

Navigate Site

  • About Us
  • Advertise with us
  • Contact Us
  • Copyright Policy
  • Disclaimer

Follow Us

No Result
View All Result
  • Android
  • Freewares
  • Tutorial
  • Windows 11
  • macOS

© 2021 Techniqued - Technology, Tips, Tricks and Reviews

This website uses cookies. By continuing to use this website you are giving consent to cookies being used. Visit our Privacy and Cookie Policy.