If you have used any version of Windows, you might be knowing the Windows Photo Viewer app, which is one of the best apps for quickly viewing a photo. It also supports basic features like zooming of photo and play a slideshow and more. But with Windows 10, Microsoft has made a lot of changes. There are two separate apps – Photos and Windows Photo Viewer. If you have upgraded from Windows 8 or 7 to Windows 10, you will see Photo Viewer along with Photos app. But if you have clean installed Windows 10, Windows Photo Viewer is disabled and you have to use Photos app. So how to restore Windows Photo Viewer on Windows 10.
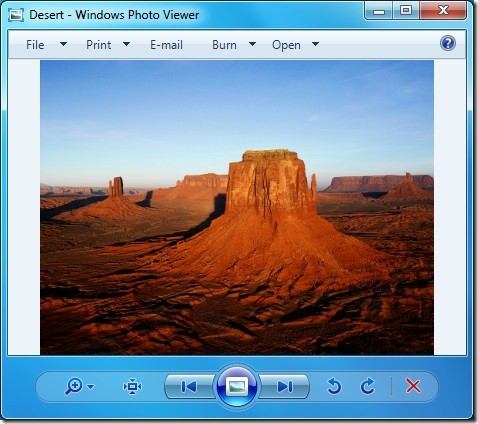
Restore Windows Photo Viewer on Windows 10:
In order to enable or restore Windows Photo Viewer on Windows 10, you will need to make some changes to the registry. So before doing that make sure you take a backup of Windows 10 registry, in case you do not know how to do it, please follow this article. This is just in case anything goes wrong, you can enable it back using backup.
Once you have backed up the registry, open a new notepad file on Windows 10. You can use the run command and type notepad to open it. Now copy and paste the below code on to the notepad.
Windows Registry Editor Version 5.00
[HKEY_CLASSES_ROOT\Applications\photoviewer.dll] [HKEY_CLASSES_ROOT\Applications\photoviewer.dll\shell] [HKEY_CLASSES_ROOT\Applications\photoviewer.dll\shell\open] “MuiVerb”=”@photoviewer.dll,-3043”
[HKEY_CLASSES_ROOT\Applications\photoviewer.dll\shell\open\command] @=hex(2):25,00,53,00,79,00,73,00,74,00,65,00,6d,00,52,00,6f,00,6f,00,74,00,25,\
00,5c,00,53,00,79,00,73,00,74,00,65,00,6d,00,33,00,32,00,5c,00,72,00,75,00,\
6e,00,64,00,6c,00,6c,00,33,00,32,00,2e,00,65,00,78,00,65,00,20,00,22,00,25,\
00,50,00,72,00,6f,00,67,00,72,00,61,00,6d,00,46,00,69,00,6c,00,65,00,73,00,\
25,00,5c,00,57,00,69,00,6e,00,64,00,6f,00,77,00,73,00,20,00,50,00,68,00,6f,\
00,74,00,6f,00,20,00,56,00,69,00,65,00,77,00,65,00,72,00,5c,00,50,00,68,00,\
6f,00,74,00,6f,00,56,00,69,00,65,00,77,00,65,00,72,00,2e,00,64,00,6c,00,6c,\
00,22,00,2c,00,20,00,49,00,6d,00,61,00,67,00,65,00,56,00,69,00,65,00,77,00,\
5f,00,46,00,75,00,6c,00,6c,00,73,00,63,00,72,00,65,00,65,00,6e,00,20,00,25,\
00,31,00,00,00
[HKEY_CLASSES_ROOT\Applications\photoviewer.dll\shell\open\DropTarget] “Clsid”=”{FFE2A43C-56B9-4bf5-9A79-CC6D4285608A}”
[HKEY_CLASSES_ROOT\Applications\photoviewer.dll\shell\print] [HKEY_CLASSES_ROOT\Applications\photoviewer.dll\shell\print\command] @=hex(2):25,00,53,00,79,00,73,00,74,00,65,00,6d,00,52,00,6f,00,6f,00,74,00,25,\
00,5c,00,53,00,79,00,73,00,74,00,65,00,6d,00,33,00,32,00,5c,00,72,00,75,00,\
6e,00,64,00,6c,00,6c,00,33,00,32,00,2e,00,65,00,78,00,65,00,20,00,22,00,25,\
00,50,00,72,00,6f,00,67,00,72,00,61,00,6d,00,46,00,69,00,6c,00,65,00,73,00,\
25,00,5c,00,57,00,69,00,6e,00,64,00,6f,00,77,00,73,00,20,00,50,00,68,00,6f,\
00,74,00,6f,00,20,00,56,00,69,00,65,00,77,00,65,00,72,00,5c,00,50,00,68,00,\
6f,00,74,00,6f,00,56,00,69,00,65,00,77,00,65,00,72,00,2e,00,64,00,6c,00,6c,\
00,22,00,2c,00,20,00,49,00,6d,00,61,00,67,00,65,00,56,00,69,00,65,00,77,00,\
5f,00,46,00,75,00,6c,00,6c,00,73,00,63,00,72,00,65,00,65,00,6e,00,20,00,25,\
00,31,00,00,00
[HKEY_CLASSES_ROOT\Applications\photoviewer.dll\shell\print\DropTarget] “Clsid”=”{60fd46de-f830-4894-a628-6fa81bc0190d}”
Now save this file as a .reg file which means it will be a registry file. In order to do that when you type the name of the file while saving add an extension .reg to it. Now double click on this file and execute the registry file.
Now that we have executed the registry file, you can now restart the PC. Windows Photo Viewer will be enabled on your PC. You can now right click on any image and select open With and you will see the option of Windows Photo Viewer.

Using this trick you will be able to experience Windows Photo viewer on your Windows 10 PC.


