Techniqued- Technoloy, Review and Tutorials
  • Android
  • Freewares
  • Tutorial
  • Windows 11
  • macOS
No Result
View All Result
Techniqued- Technoloy, Review and Tutorials
  • Android
  • Freewares
  • Tutorial
  • Windows 11
  • macOS
No Result
View All Result
Techniqued- Technoloy, Review and Tutorials
No Result
View All Result

How to Set the Maximum Memory to be Used by Windows 7

Nirmal by Nirmal
August 13, 2013
in Windows 7
1
Share on FacebookShare on Twitter

Windows 7 is most popular operating system used by users all over the world and we have covered many tips and tutorials on the same. Many people might not be knowing the fact that Windows 7 has an option to set the amount of RAM used by the OS. This article will help you to set usage of RAM in Window 7.

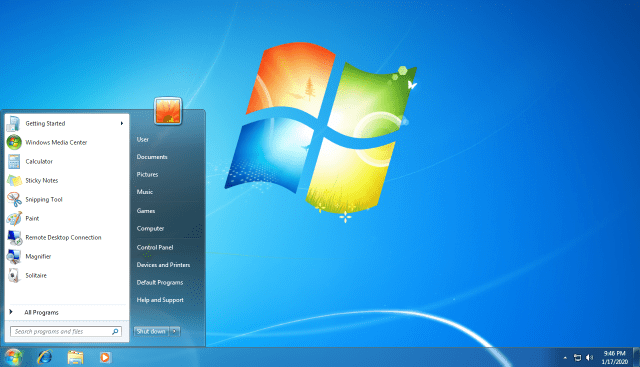
1. First, open the Windows 7 Start menu and then Type msconfig and Hit Enter
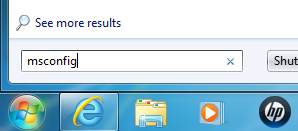
MsConfig

2. This will open the Window 7 system configuration utility, select the Boot tab and click on advance option button.
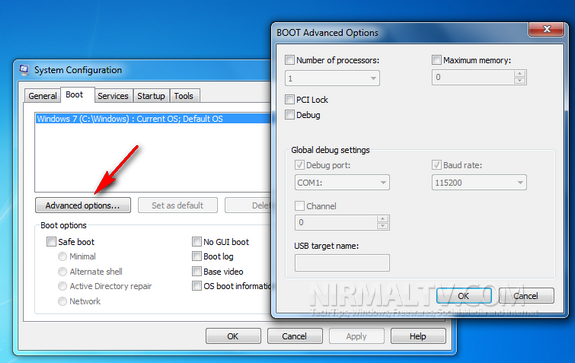
Advanced Boot Options

3. In the advanced Boot options, check the box against Maximum Memory and enter the amount which you want to use, as we all know that by default window 7 uses all RAM.

Note: Don’t set memory below 700 otherwise it will become unstable.
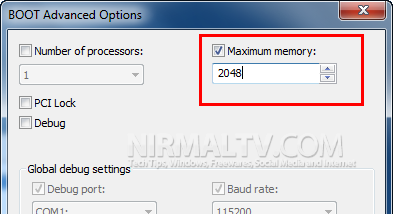
Set Max memory

4. Then click OK and it will close the advanced boot option. Now check the box against Make all boot settings permanent and then click Apply. This will reboot your PC instantly, so make sure you have saved all your work.
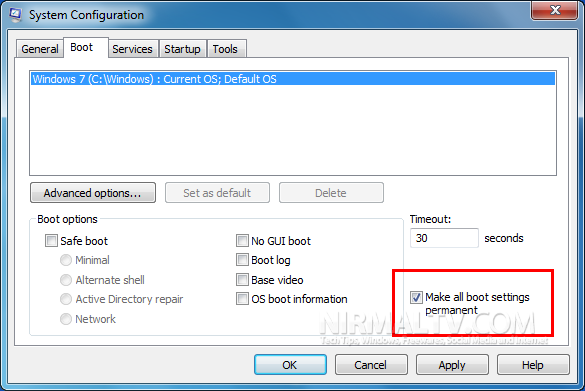
Make Permenant

Note: When you get restart you can see the change just by going Performance Tab in Window Task Manager (CTRL+SHIFT+ESCAPE)

If you have a integrated graphics chip on your motherboard and are using a graphics card instead, then double check your BIOS settings to make sure that you do not have any memory allocated to the integrated graphics chip.


Tags: Guest BloggingGuest PostMaximum RAMRAM UsageTipsTutorialWindows 7
ShareTweetSendSend
Previous Post

How to Speed Up Your Computer

Next Post

What are Atiedxx.exe, Atiesrxx.exe, CCC.Exe and Mom.exe Processes in Windows?

Related Posts

Windows 10

Where can I Download Windows Legally

April 15, 2020
Windows 7

How to Download Windows 7 ISO [Tutorial]

April 2, 2020
Windows 7

Difference between Sleep, Hibernate, and Hybrid Sleep in Windows 10?

November 19, 2019
Windows 10

How to Fix USB Device Not Recognized on Windows 10

November 11, 2019
Windows 10

Winaero Tweaker – Universal Tweaker Software for Windows

March 11, 2015
Windows 7

How to get Windows 10 Style Folder icons in Windows 8 and Windows 7

December 30, 2014

Comments 1

  1. Vikram says:
    14 years ago

    Thanks for sharing the info. Hope this will recude the boot time as all the programs and commands will be executed faster. 🙂

    Reply

Leave a Reply Cancel reply

Your email address will not be published. Required fields are marked *

This site uses Akismet to reduce spam. Learn how your comment data is processed.


Latest Articles

How to Fix “Installation can’t continue” when trying to Update Nvidia Graphics Drivers

Download Windows 11 24H2 ISO (Offline Installer)

Can I Run Windows 11 without Activating

How to Use Snapchat on PC

How to Delete YouTube Search and Watch History on iPhone

How to Use Energy Saver on Windows 11

Techniqued- Technoloy, Review and Tutorials

© 2021 Techniqued - Technology, Tips, Tricks and Reviews

Navigate Site

  • About Us
  • Advertise with us
  • Contact Us
  • Copyright Policy
  • Disclaimer

Follow Us

No Result
View All Result
  • Android
  • Freewares
  • Tutorial
  • Windows 11
  • macOS

© 2021 Techniqued - Technology, Tips, Tricks and Reviews

This website uses cookies. By continuing to use this website you are giving consent to cookies being used. Visit our Privacy and Cookie Policy.