Previously we had written a simple tutorial on how to resize disk partition in Windows 7. Many of the readers have asked us through emails, various doubts on how to create, shrink and re-size disk partitions in Windows 7. The Disk Management in built utility is able to do the job of shrinking and expanding partitions. This guide will help you to easily create partitions, shrink partitions, extend partitions in Windows 7.

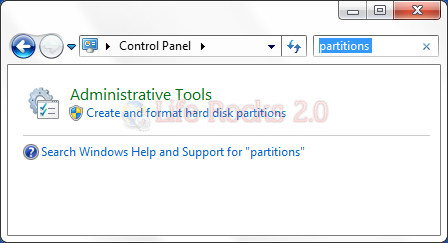
To start with, first open the Disk Management utility, to do this type partition in search bar in the control panel. Then click the Create and format disk partitions link. This will open the Disk Management tool.
Create a new Partition: You can create a new partition either by using the unallocated space or shrinking an already existing volume. To create a new volume from unallocated space, right click the unallocated space in the disk management and click New Simple Volume and create it based on your disk size.
![Unallocated space[3] Unallocated space[3]](https://www.nirmaltv.com/images/Unallocatedspace3.png)
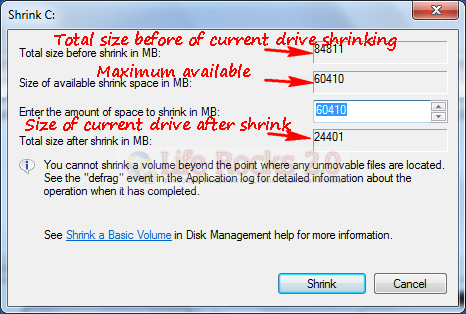
If you want to create a new partition by shirking an existing volume, right click on the volume and select Shrink Volume. The tool will query for available space for shrinking.
![Shrink[3] Shrink[3]](https://www.nirmaltv.com/images/Shrink3.png)
Now it will ask you to specify the size of the new volume. Here you can see the maximum possible space, space after shrink and the size you have selected.
![extended volumen[8] extended volumen[8]](https://www.nirmaltv.com/images/extendedvolumen8.png)
Size of volume before shrink
![Volume shrinked[4] Volume shrinked[4]](https://www.nirmaltv.com/images/Volumeshrinked4.png)
Size of Volume after shrink (you can see the new unallocated space got through shrink). Now you can right click the new unallocated space and create a new volume.
Extend a Volume: you can increase the size of the volume by extending it. But keep in mind that you can only extend the volume if there is unallocated space continuous, which means in the image below, you can extend drive D, but not C as the free space is beside D.

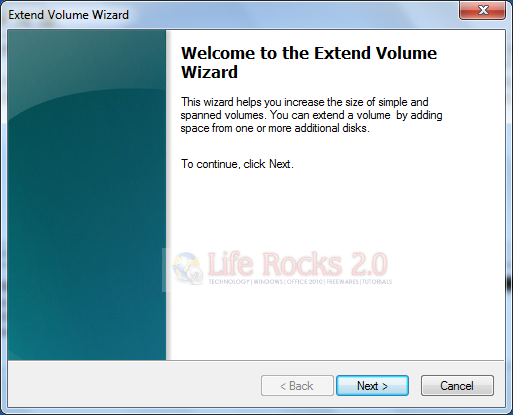
To extend a drive, right click on the drive and click Extend Volume, this will open up the wizard.
In the next step, select the unallocated space for extending and click next and then click Finish.
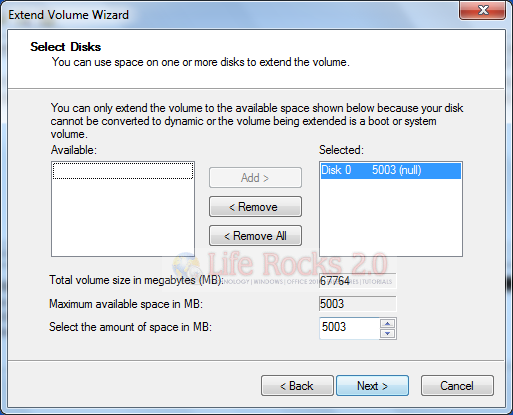
Now you can see that the drive D in image above is extended by 5GB.
![extended volumen[8] extended volumen[8]](https://www.nirmaltv.com/images/extendedvolumen81.png)
You can create a maximum of 4 drives using this tool. If you want advanced features, you need to use third party tools.



Hi Nirmal…
Thanks for the tips…
But I have a question :
When I want to create a new volume, in the last step a warning appear : The volume will become dynamic disk. Whats this mean ? what is the effect ?
Thanks
Its Gooood..
But I ‘hv problem..
I have 500 GB Hard Disk..
Intially there is only one Drive of 465 GB..
Then I had shrink that drive.then
two drives has been created like 225 GB in which Windows 7 is installed already & 235GB
but I dont want that drive to be 225 GB ,I want to Shrink / minimizes it. I want more drives .So what should I Do?
Thank u…
Thanks guys. I was able to shrink my drive C but when i want to allocate the unallocated partion i get error “there is no enough space available on the disk(s) to complete this operation”
What could it be?
Hi Nirmal
There is a warning appears when doing new simple volume wizard , when click finish — “Selected basic disk to dynamic disk. if you convert the disk to dynamicyou will not be able to start installed opratiing systemsfrom any volume on the disk”
What could it be..!!
Thank you.
hi sir
Extend a Volume: you can increase the size of the volume by extending it. But keep in mind that you can only extend the volume if there is unallocated space continuous, which means in the image below, you can extend drive D, but not C as the free space is beside D.
While partitioning should C drive be not too large and space allocated for other drives? What is the problem if in a 500 GB HD the C is allocated 300 GB? What is the ideal size for a C drive in a 500 Gb Hd or 320 Gb HD?