Unlike Windows XP, where upgrade to Windows 7 is not directly possible, Windows Vista users can upgrade to Windows 7 based on the version they are using. But when upgrading Vista to Windows 7, many users have noted that the upgrade was not successful, which resulted in error. But the worst fact is that when the computer restarts, it tries to upgrade again resulting in reboot loop.

The Upgrade Error Message:
The upgrade was not successful.
Your previous version of windows is being restored.
Do not restart your computer during this time.
When the computer restarts, it does not roll back to Windows Vista. The upgrade process starts again and then fails with the same error message. This issue occurs repeatedly and the upgrade process is stuck in a reboot loop.
Related: How to Upgrade Windows XP to Windows 7
Cause of this Error:
This issue may occur because the computer contains one or more shell folders (Documents, Pictures, Music, and so on) that are redirected to locations within their own paths
How to Solve this Issue?
To resolve the endless reboots, you will have to access the Windows Recovery environment, locate the duplicate folders, and then move the duplicate folders to a temporary location. Once the system is rolled back to Vista, you need to make sure that this does not occur again. There are four steps involved in the process as detailed by Microsoft support article KB 978421.
Step 1: Access the Windows Recovery Environment
To access the Windows Recovery Environment, follow these steps:
- Put the Windows 7 installation disc in the DVD drive, and then restart the computer.
- Press a key when you are prompted to restart from the disc.
- In the Install Windows window, select a language, a time, a currency, a keyboard input method or other input method, and then click Next.
- In the Install Windows window, click Repair your computer.Note Do not click the Install Now button.
- In the System Recovery Options window, click the version of the Windows 7 operating system that you want to repair, take note of the drive letter that is assigned to the operating system (like C:), and then click Next.
- In the System Recovery Options window, click Command Prompt.
- A command prompt window opens.
Step 2: Locate the duplicate folders
To locate the duplicate folders, follow these steps within the Windows Recovery Environment:
- At the command prompt, type the following command and then press ENTER:cd c:users
Note Replace “C:” with your system drive letter where windows is installed. - At the command prompt, type the following command and then press ENTER:dir /s | find “is too long” |more

- If this command provides data, note the folder names that are displayed, and then go to Step 3.
- If “—More—” is displayed at the bottom of the page, press the space bar to continue to the next screen. Note the new folder names that are displayed. Repeat this process until “—More—” is no longer displayed at the bottom of the screen, and then go to Step 3.
- If this command provides no data, this problem is not caused by shell folder redirection, and the remainder of the steps in this article should not be followed.
Step 3: Move the duplicate folders to a temporary location
To move these duplicate folders to a temporary location, follow these steps:
- At the command prompt, type the following command and then press ENTER:move [Identified_folder] [Destination_location]For example, type the following:
move C:UsersBobDocumentsDocuments C:Temp
- Use the “move” command to move all the duplicated folders that are identified.
- Use the cd c:users and dir /s | find “is too long” |more commands to verify that there are no other duplicate folders.
- At the command prompt, type Exit, and then press Enter.
- Restart the computer. The “The upgrade was not successful” message is displayed again. But this time, the message stays longer on the screen and a progress bar is active. After some time, the computer restarts and the system should roll back to Windows Vista.
Step 4: Confirm that the shell folders are not redirected
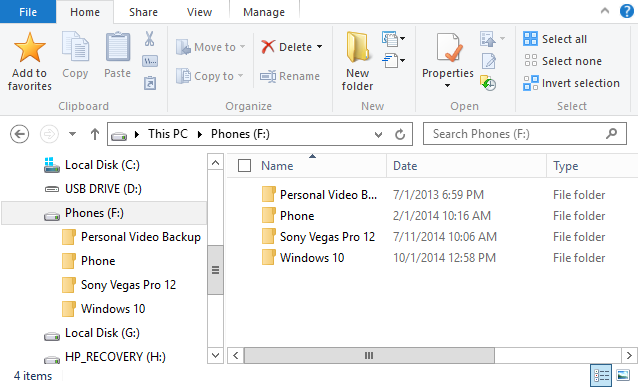
- In Windows Vista, open the “C:Users” folder, and then open your personal folder or the user folder that contains the problems.
- Confirm that the shell folders are not redirected to other locations.
To confirm a shell folder is not redirected, follow these steps:- Right-click a shell folder, click Properties, and then click Location.
- Confirm that the path shown correctly displays the path to this folder.
For example, the “C:UsersBobDocuments” folder should have the path “C:UsersBobDocuments” displayed on the Location tab. - If the path is not correct, click Restore Defaults.
- Restart the computer, and then retry the upgrade process.
This fix applies to Windows Vista as well as Windows 7.


I don’t have the disc. I downloaded windows 7 from the microsoft site. How can I resolve this?