Techniqued- Technoloy, Review and Tutorials
  • Android
  • Freewares
  • Tutorial
  • Windows 11
  • macOS
No Result
View All Result
Techniqued- Technoloy, Review and Tutorials
  • Android
  • Freewares
  • Tutorial
  • Windows 11
  • macOS
No Result
View All Result
Techniqued- Technoloy, Review and Tutorials
No Result
View All Result

How to Remove Startup Items in macOS

Nirmal by Nirmal
April 8, 2023
in macOS
0
Share on FacebookShare on Twitter

When you turn on your Macbook or your macOS machine, you might be seeing that various apps, add-ons, and other processes are running in the background even without you having opened them. Ever wondered how these apps are running in the background? While most of these apps might be from the apps you have installed, there are some processes running in the background that can cause problems. You will need to remove them from the startup list. These processes might delay the booting of your macOS and also might slow down your system. Here is how to remove startup items in macOS and speed up your macOS booting.

Related Reading: How to Enable Firewall on macOS Ventura

Remove Startup Items in macOS

How to Remove Startup Items in macOS:

If you want to remove or deselect the start-up items in macOS, follow the steps below.

Step 1: In your macOS, open the settings app.

Step 2: In the settings app, select General settings by scrolling down.

Remove Startup Items in macOS

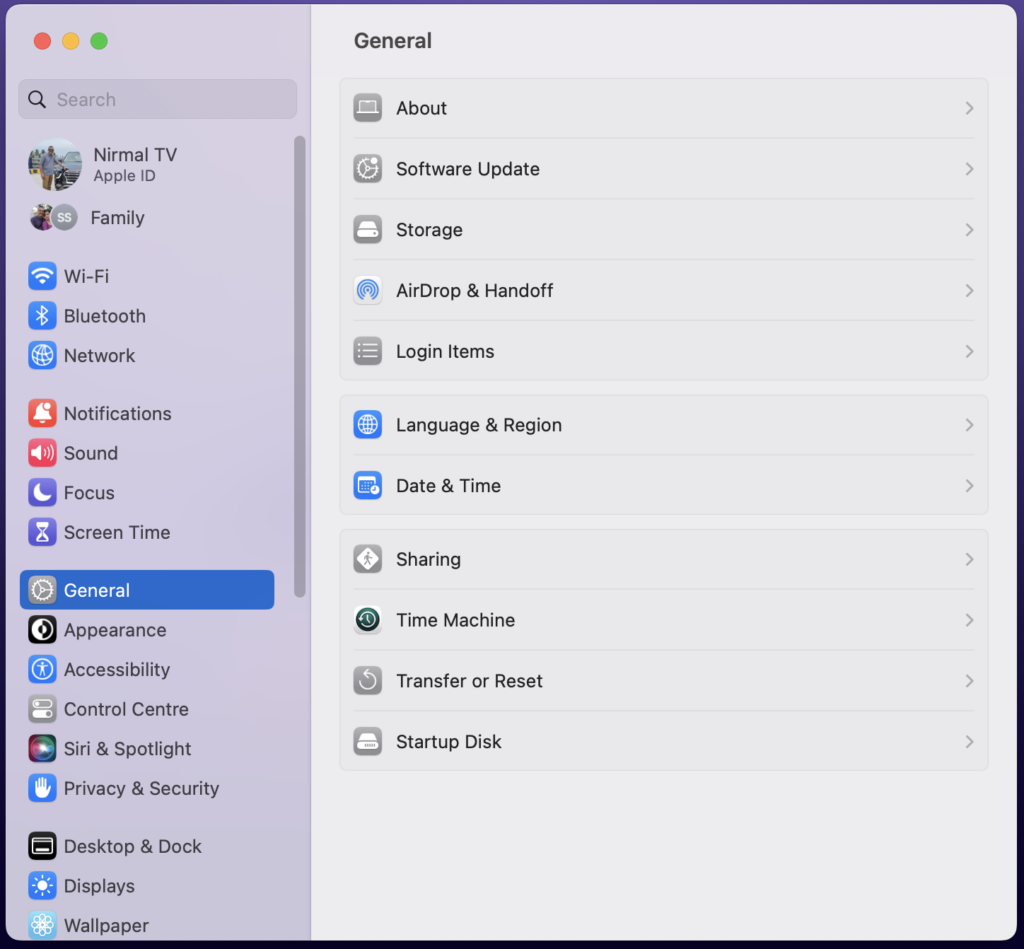
Step 3: In the general settings, click on Login Items listed on the right panel.

Step 4: Here you will be able to see all the apps, services, and other processes which start automatically with login.

Remove Startup Items in macOS

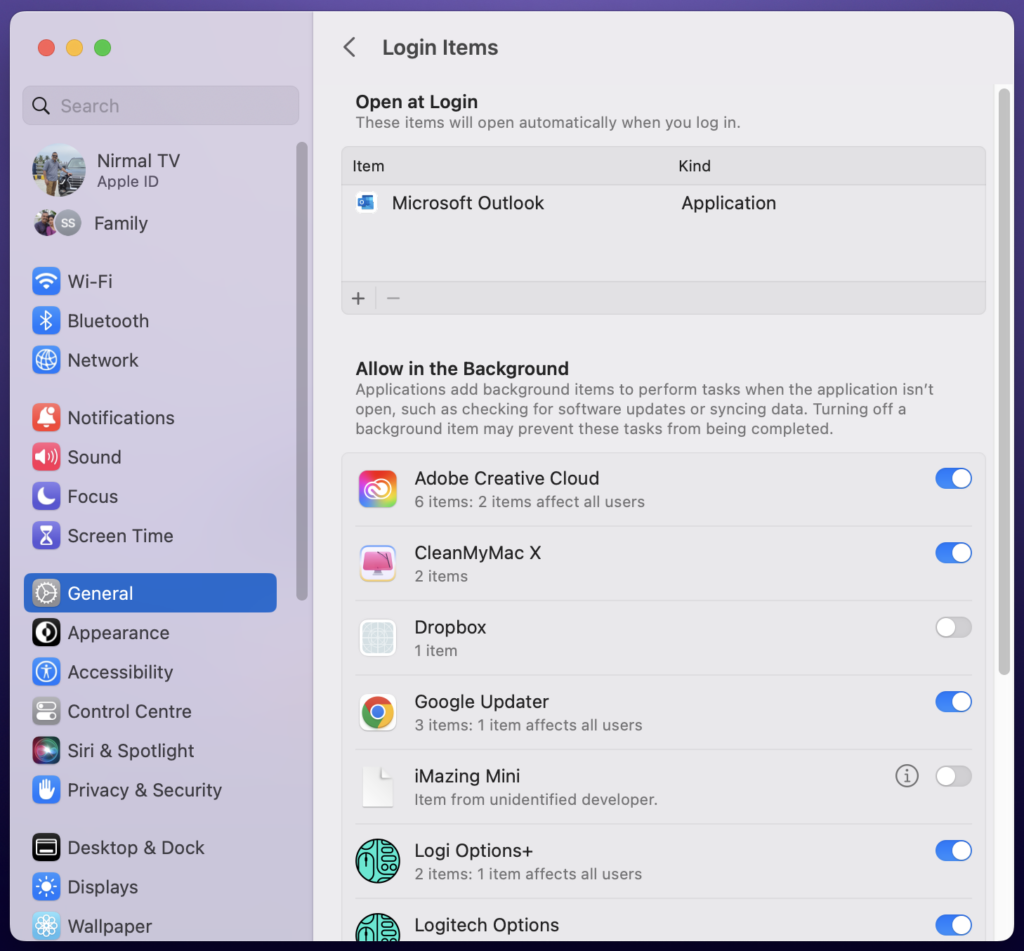
Step 5: Against each entry, you will be able to see a slider that allows you to enable or disable it from the login items.

Step 6: You need to find out all the items which are not needed for you and disable them using this slide.

Step 7: In case you want to add any particular app to the list, you will be able to see a + icon and when you click on it, the system will show the list of all apps installed on your macOS and you can select any of the above to be added to the list.

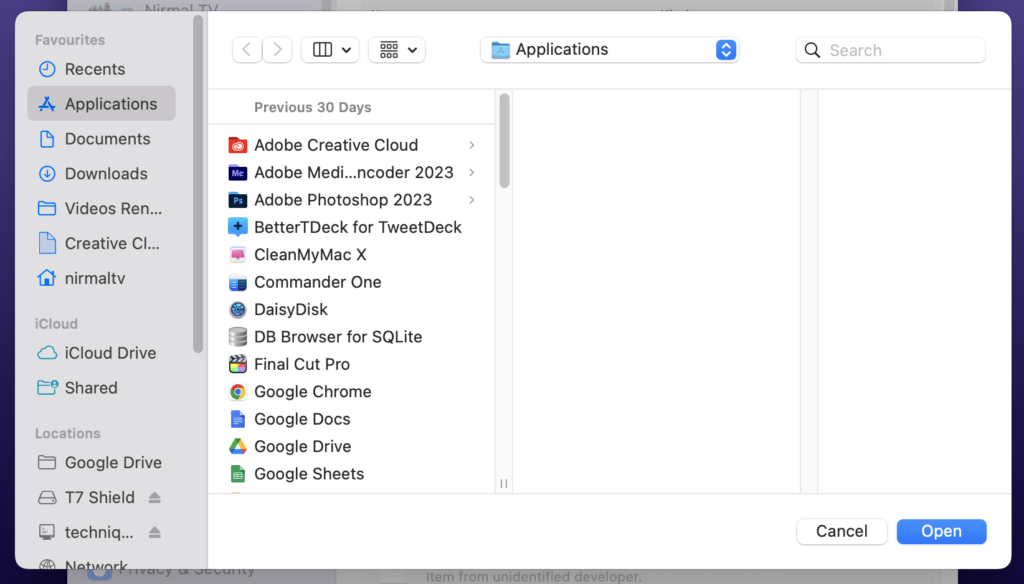
Step 8: Once you have added it, the app will also be started automatically when you log in to macOS.

Using this method you can check the apps and processes that are loading with your macOS boot and add or remove them based on your preferences.

Tags: How tomacOS
ShareTweetSendSend
Previous Post

How to Clear Browsing Data on Safari on macOS

Next Post

POCO C51 Review- A Good Budget Option with Stock Android

Related Posts

macOS

How to Reset Network Settings on macOS

November 25, 2023
macOS

3 Easy Ways to Switch User Accounts in macOS Sonoma

October 27, 2023
macOS

How to Enable Game Mode on macOS Sonoma

October 16, 2023
macOS

How to Customize the New Login Screen on macOS Sonoma

October 15, 2023
macOS

How to Add Widgets to macOS Sonoma

October 11, 2023
Apple iPhone

Universal Clipboard Not Working Between iPhone and MacOS- How to Fix

October 3, 2023

Leave a Reply Cancel reply

Your email address will not be published. Required fields are marked *

This site uses Akismet to reduce spam. Learn how your comment data is processed.


Latest Articles

How to Fix “Installation can’t continue” when trying to Update Nvidia Graphics Drivers

Download Windows 11 24H2 ISO (Offline Installer)

Can I Run Windows 11 without Activating

How to Use Snapchat on PC

How to Delete YouTube Search and Watch History on iPhone

How to Use Energy Saver on Windows 11

Techniqued- Technoloy, Review and Tutorials

© 2021 Techniqued - Technology, Tips, Tricks and Reviews

Navigate Site

  • About Us
  • Advertise with us
  • Contact Us
  • Copyright Policy
  • Disclaimer

Follow Us

No Result
View All Result
  • Android
  • Freewares
  • Tutorial
  • Windows 11
  • macOS

© 2021 Techniqued - Technology, Tips, Tricks and Reviews

This website uses cookies. By continuing to use this website you are giving consent to cookies being used. Visit our Privacy and Cookie Policy.