Techniqued- Technoloy, Review and Tutorials
  • Android
  • Freewares
  • Tutorial
  • Windows 11
  • macOS
No Result
View All Result
Techniqued- Technoloy, Review and Tutorials
  • Android
  • Freewares
  • Tutorial
  • Windows 11
  • macOS
No Result
View All Result
Techniqued- Technoloy, Review and Tutorials
No Result
View All Result

How to Password Protect a PDF file on macOS

Nirmal by Nirmal
December 16, 2022
in macOS
0
Share on FacebookShare on Twitter

Our personal digital files always need to be secured when we are sharing with others or any specific people in our family. These personal files or documents will contain your personal information and the best way is to password-protect these files in case you are sharing them online with anyone. One of the most commonly used formats for documents is PDF and these are very commonly used formats for ease of sharing and viewing. So next time when you are sharing your PDF document, you can password-protect it. If you are using a Mac, here is how to password-protect a PDF file on macOS Ventura.

Related Reading: How to Find Your MAC Address in macOS Ventura 

Password Protect a PDF file on macOS

How to Password Protect a PDF file on macOS:

macOS Ventura offers an option to password-protect any PDF file without having to install any other app or tools, here is how to do it.

Step 1: Locate the PDF file you want to password protect, right-click on the file and select Open with-> Preview.

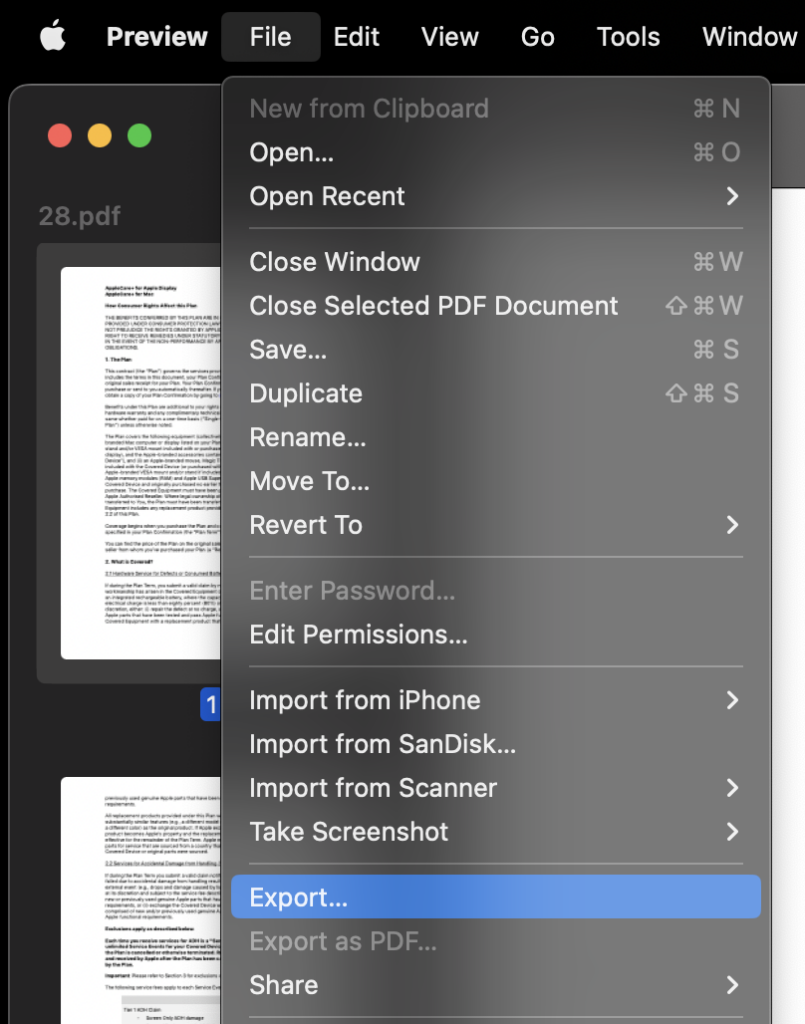
Step 2: Once the file is opened in Preview, click on the File menu of Preview and select the Export option.

Password Protect a PDF file on macOS

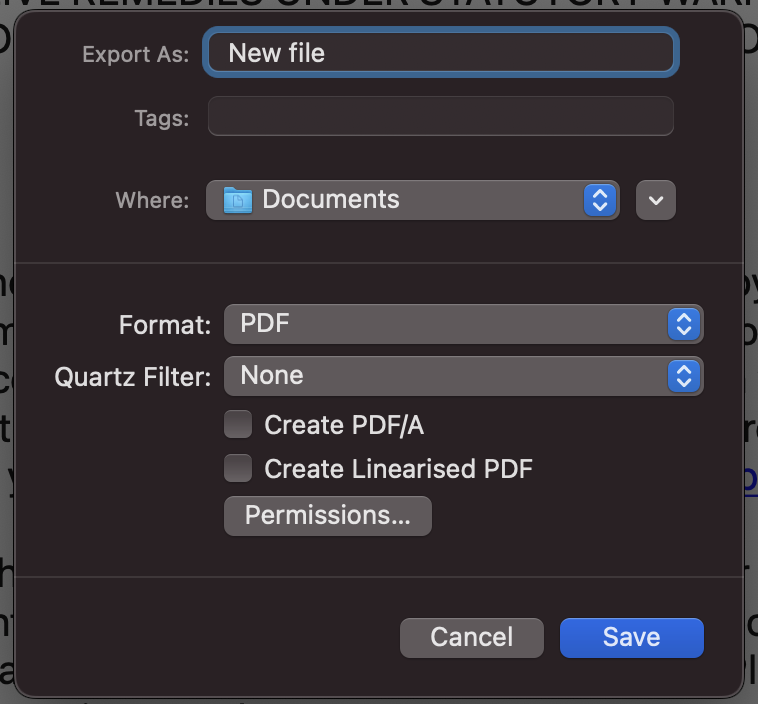
Step 3: This will bring up an export window where you can specify your new file name and tag and the location where you want to save your file. At the bottom you will be able to see a button with the name Permissions, click on it.

Password Protect a PDF file on macOS

Step 4: In the permissions box, you can check the box against “Require password to open document” and then enter the password and verify it.

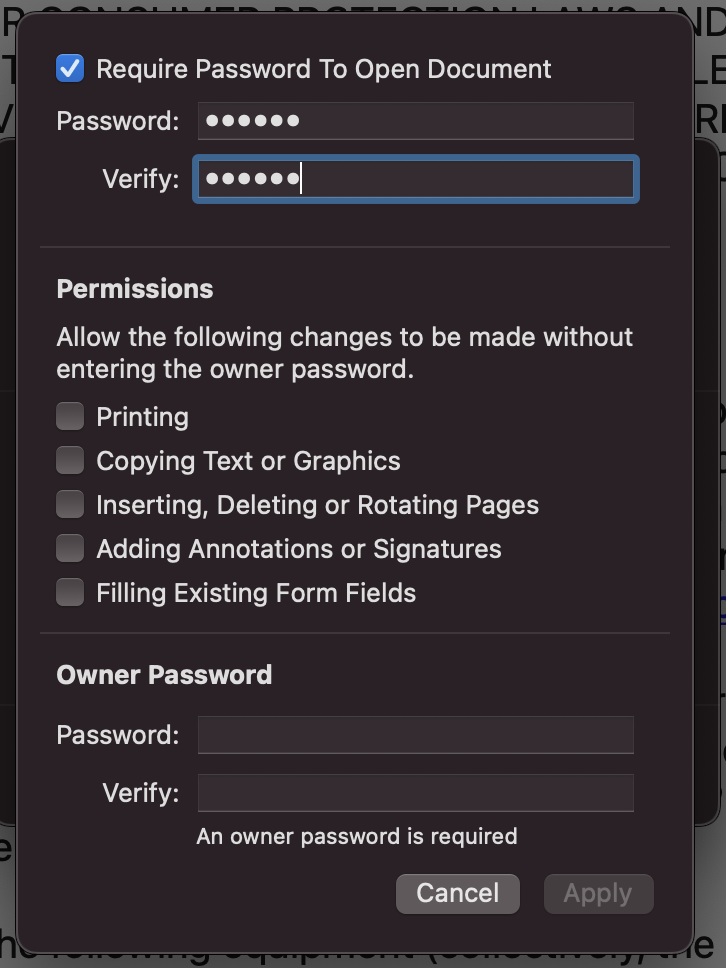
Step 5: You can also set individual permissions if you want the file to be protected for printing, copying, filling, etc.

Step 6: Finally, you need to enter an owner password for the document and click on the Apply button.

Step 7: From now on, whenever you open the document, it will ask for the password and once you enter the password it will open.

This is how you can easily password-protect a PDF file on macOS without any third-party tools.


Tags: How tomacOSPDF
ShareTweetSendSend
Previous Post

How to Reset Hosts File in Windows 11

Next Post

How to Transfer Music From Windows to iPhone

Related Posts

macOS

How to Reset Network Settings on macOS

November 25, 2023
macOS

3 Easy Ways to Switch User Accounts in macOS Sonoma

October 27, 2023
macOS

How to Enable Game Mode on macOS Sonoma

October 16, 2023
macOS

How to Customize the New Login Screen on macOS Sonoma

October 15, 2023
macOS

How to Add Widgets to macOS Sonoma

October 11, 2023
Apple iPhone

Universal Clipboard Not Working Between iPhone and MacOS- How to Fix

October 3, 2023

Leave a Reply Cancel reply

Your email address will not be published. Required fields are marked *

This site uses Akismet to reduce spam. Learn how your comment data is processed.


Latest Articles

How to Fix “Installation can’t continue” when trying to Update Nvidia Graphics Drivers

Download Windows 11 24H2 ISO (Offline Installer)

Can I Run Windows 11 without Activating

How to Use Snapchat on PC

How to Delete YouTube Search and Watch History on iPhone

How to Use Energy Saver on Windows 11

Techniqued- Technoloy, Review and Tutorials

© 2021 Techniqued - Technology, Tips, Tricks and Reviews

Navigate Site

  • About Us
  • Advertise with us
  • Contact Us
  • Copyright Policy
  • Disclaimer

Follow Us

No Result
View All Result
  • Android
  • Freewares
  • Tutorial
  • Windows 11
  • macOS

© 2021 Techniqued - Technology, Tips, Tricks and Reviews

This website uses cookies. By continuing to use this website you are giving consent to cookies being used. Visit our Privacy and Cookie Policy.