Techniqued- Technoloy, Review and Tutorials
  • Android
  • Freewares
  • Tutorial
  • Windows 11
  • macOS
No Result
View All Result
Techniqued- Technoloy, Review and Tutorials
  • Android
  • Freewares
  • Tutorial
  • Windows 11
  • macOS
No Result
View All Result
Techniqued- Technoloy, Review and Tutorials
No Result
View All Result

How to Charge your Smartphone when Laptop Lid is Closed (Sleep Mode)

Nirmal by Nirmal
May 25, 2016
in Tips and Tricks
0
Share on FacebookShare on Twitter

When you are running out of power on your smartphone, you can always use a USB cable connected to the laptop to charge your smartphone. While the charging is pretty low from a USB device compared to normal wall charger, it still charges your phone. This helps you if you are on low battery. But at the same time, if you close the laptop lid (sleep mode), the charging also stops. So in such cases if you keep the laptop open, you end up losing battery on your laptop as well.

So how do you charge your smartphone when laptop lid is closed?
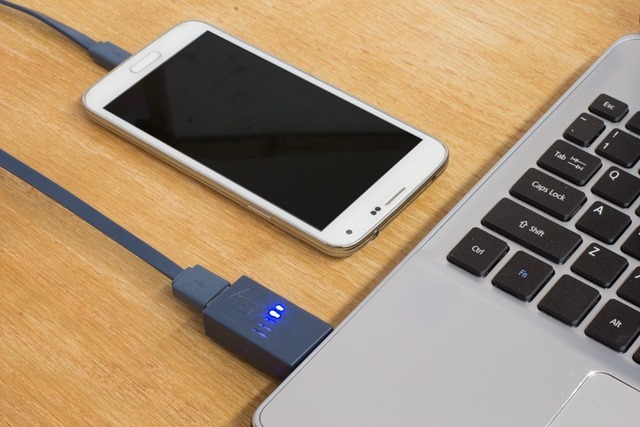
smartphone charging from laptop


The solution to this issue is pretty simple. You need to open the device manager in Windows. For Windows 10, right click on the start menu and select device manager. For other versions, you can search for device manager in control panel.

Once you have open the device manager, navigate to the Universal Serial Bus Controller section. Expand this option and you will see all the USB ports listed here. Now if you want to enable charging on a particular port, right click on that port and select properties.
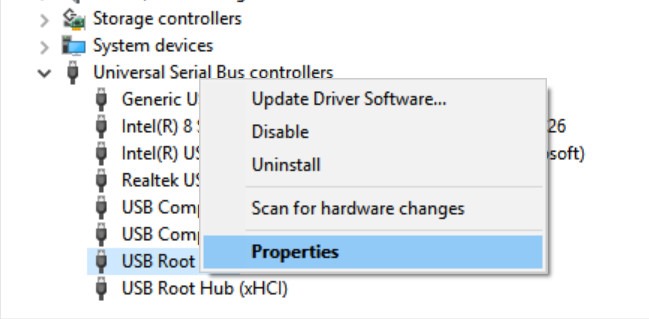
 

USB root

In the properties tab for USB root hub, select the Power Management tab.
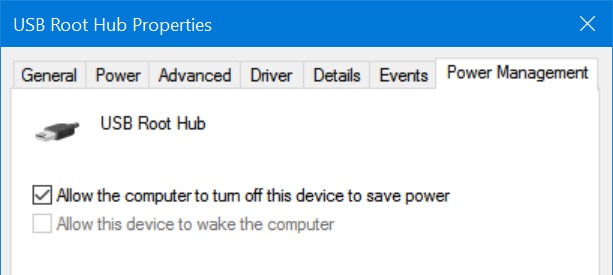
Power management USB

Here you need to uncheck the option ‘Allow the computer to turn off this device to save power’. Now click ok and close the box. Now you can charge your smartphone using USB cable even when the laptop lid is closed (sleep mode).

Please note that you need to follow this step for each USB hub. If you want to enable charging on all the USB ports, you have to do it one by one.

Tags: TipsTricksTutorialsWindows
ShareTweetSendSend
Previous Post

Are Virtual Assistants Really That?

Next Post

Manage Automatic Software Updates on Windows

Related Posts

Tips and Tricks

Can I Run Windows 11 without Activating

June 14, 2024
Social Networks

How to Change your Instagram Name

May 12, 2024
Social Networks

How To View Your Instagram Reels Watch History

May 11, 2024
Social Networks

How To Post Longer Videos On Instagram

May 6, 2024
Social Networks

How to Find Who Unfollowed you on Instagram

December 9, 2023
Social Networks

How to Download Instagram Reels [Official Method]

November 28, 2023

Leave a Reply Cancel reply

Your email address will not be published. Required fields are marked *

This site uses Akismet to reduce spam. Learn how your comment data is processed.


Latest Articles

How to Fix “Installation can’t continue” when trying to Update Nvidia Graphics Drivers

Download Windows 11 24H2 ISO (Offline Installer)

Can I Run Windows 11 without Activating

How to Use Snapchat on PC

How to Delete YouTube Search and Watch History on iPhone

How to Use Energy Saver on Windows 11

Techniqued- Technoloy, Review and Tutorials

© 2021 Techniqued - Technology, Tips, Tricks and Reviews

Navigate Site

  • About Us
  • Advertise with us
  • Contact Us
  • Copyright Policy
  • Disclaimer

Follow Us

No Result
View All Result
  • Android
  • Freewares
  • Tutorial
  • Windows 11
  • macOS

© 2021 Techniqued - Technology, Tips, Tricks and Reviews

This website uses cookies. By continuing to use this website you are giving consent to cookies being used. Visit our Privacy and Cookie Policy.